
Snowflake has simplified the integration of Machine Learning models into Data Applications through its convenient features that allow for the deployment of ML models as Stored Procedures, User Defined Functions (UDF's), and User Defined Table Functions (UDTF's). Furthermore, Snowflake offers a SQL API, a RESTful API to facilitate querying the deployed ML models, enabling seamless integration between the application and the ML model.
In this tutorial, the application you are building helps fictitious food truck company, Tasty Bytes and it's Truck drivers to view the location recommendations provided by the ML model directly in the Data Application. This Location Recommendation ML model is built within Snowflake using Snowpark which makes it easy for python users to leverage Snowflake platform. This model uses historical sales data and Safegraph weather data from Snowflake Marketplace to provide more information to the model. This tutorial will guide you through the process of how we are deploying and integrating ML model into the Truck Driver App.
Prerequisites
- Privileges necessary to create a user, database, and warehouse in Snowflake
- Ability to install and run software on your computer
- Basic experience using git
- Intermediate knowledge of SQL
- Access to run SQL in the Snowflake
What You Will Learn
- How to access third-party data from the Snowflake Marketplace
- How to train a model in Snowflake with a stored procedure
- How to deploy a model in Snowflake to a user-defined function for model inference
- How to integrate a ML model into the Data App
What You'll Need
What You'll Build
- A Data Applcation powered by ML model using Snowpark
You will use Snowsight, the Snowflake web interface, to:
- Access SafeGraph location data from the Snowflake Marketplace
- Create Snowflake objects (warehouse, database, schema)
- Ingest shift sales data from S3
- Join shift sales with the SafeGraph location data
Tasty Bytes operates food trucks in cities across the globe with each truck having the ability to choose two different selling locations per day. The locations are mapped to SafeGraph points-of-interest. You want to join latitude and longitude from the SafeGraph Marketplace data to your shift sales data to use as features in model training.
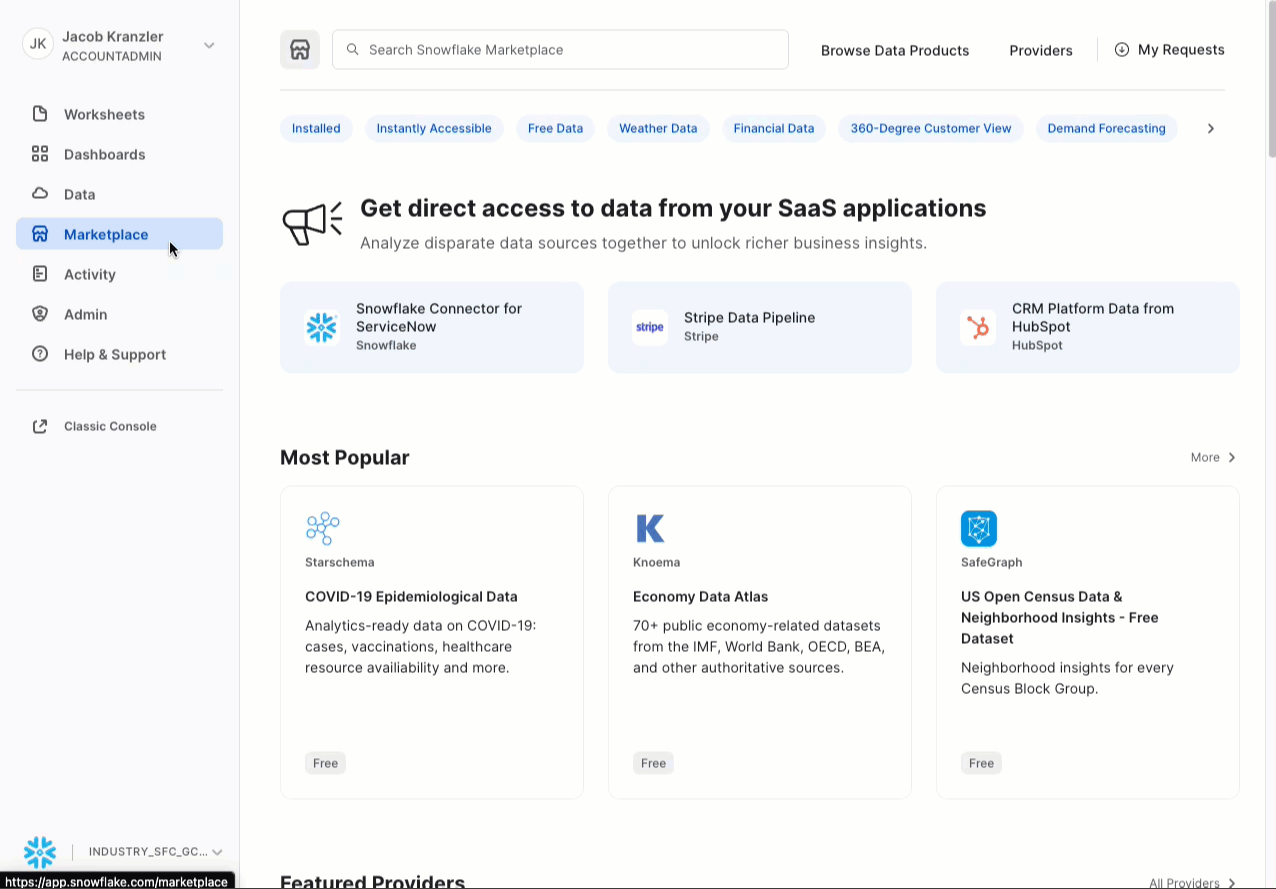
Step 1 - Acquiring SafeGraph POI Data from the Snowflake Marketplace
- Log into your Snowflake account.
- Follow the steps and video below to access the SafeGraph Marketplace listing in your Snowflake account.
- Click -> Home Icon
- Click -> Marketplace
- Search -> frostbyte
- Click -> SafeGraph: frostbyte
- Click -> Get
- Rename Database -> FROSTBYTE_SAFEGRAPH (all capital letters)
- Grant to Additional Roles -> PUBLIC
Step 2 - Creating Objects, Loading Data, and Joining Data
Navigate to Worksheets, click "+" in the top-right corner to create a new Worksheet, and choose "SQL Worksheet".
Paste and run the following SQL in the worksheet to create Snowflake objects (warehouse, database, schema), ingest raw orders data from S3, and model it for downstream usage.
-- use our accountadmin role
USE ROLE accountadmin;

-- create a development database for data science work
CREATE OR REPLACE DATABASE frostbyte_tasty_bytes_ml_app;

-- create raw, harmonized, and analytics schemas
-- raw zone for data ingestion
CREATE OR REPLACE SCHEMA frostbyte_tasty_bytes_ml_app.raw;
-- harmonized zone for data processing
CREATE OR REPLACE SCHEMA frostbyte_tasty_bytes_ml_app.harmonized;
-- analytics zone for development
CREATE OR REPLACE SCHEMA frostbyte_tasty_bytes_ml_app.analytics;

-- create csv file format
CREATE OR REPLACE FILE FORMAT frostbyte_tasty_bytes_ml_app.raw.csv_ff
type = 'csv';

-- create an external stage pointing to S3
CREATE OR REPLACE STAGE frostbyte_tasty_bytes_ml_app.raw.s3load
COMMENT = 'Quickstarts S3 Stage Connection'
url = 's3://sfquickstarts/frostbyte_tastybytes/'
file_format = frostbyte_tasty_bytes_ml_app.raw.csv_ff;

-- define shift sales table
CREATE OR REPLACE TABLE frostbyte_tasty_bytes_ml_app.raw.shift_sales(
	location_id NUMBER(19,0),
	city VARCHAR(16777216),
	date DATE,
	shift_sales FLOAT,
	shift VARCHAR(2),
	month NUMBER(2,0),
	day_of_week NUMBER(2,0),
	city_population NUMBER(38,0)
);

-- create and use a compute warehouse
CREATE OR REPLACE WAREHOUSE tasty_ml_app_wh AUTO_SUSPEND = 60;
USE WAREHOUSE tasty_ml_app_wh;

-- ingest from S3 into the shift sales table
COPY INTO frostbyte_tasty_bytes_ml_app.raw.shift_sales
FROM @frostbyte_tasty_bytes_ml_app.raw.s3load/analytics/shift_sales/;

-- join in SafeGraph data
CREATE OR REPLACE TABLE frostbyte_tasty_bytes_ml_app.harmonized.shift_sales
  AS
SELECT
    a.location_id,
    a.city,
    a.date,
    a.shift_sales,
    a.shift,
    a.month,
    a.day_of_week,
    a.city_population,
    b.latitude,
    b.longitude,
    b.location_name,
    b.street_address
FROM frostbyte_tasty_bytes_ml_app.raw.shift_sales a
JOIN frostbyte_safegraph.public.frostbyte_tb_safegraph_s b
ON a.location_id = b.location_id;

-- promote the harmonized table to the analytics layer for data science development
CREATE OR REPLACE VIEW frostbyte_tasty_bytes_ml_app.analytics.shift_sales_v
  AS
SELECT * FROM frostbyte_tasty_bytes_ml_app.harmonized.shift_sales;

-- view shift sales data
SELECT * FROM frostbyte_tasty_bytes_ml_app.analytics.shift_sales_v;
To ensure robust security measures, it is essential to establish a dedicated user account for the application, separate from your personal account. This new account will be utilized for querying Snowflake. Following best security practices, the account will employ key-pair authentication and be granted restricted access within the Snowflake environment.
Step 1: Generate Public and Private key for Authentication
Run the following commands to create a private and public key. These keys are necessary to authenticate the user with Snowflake.
$ cd ~/.ssh
$ openssl genrsa -out snowflake_app_key 4096
$ openssl rsa -in snowflake_app_key -pubout -out snowflake_app_key.pub
Step 2: Create the User and Role in Snowflake and Grant data access to this new Role
Execute the following SQL statements to create the user account and grant access to the data needed for the application.
-- use our securityadmin role
USE ROLE securityadmin;

-- create our tasty_bytes_data_ml_app_demo role
CREATE ROLE tasty_bytes_data_ml_app_demo;

-- use our accountadmin role
USE ROLE accountadmin;

-- grant privileges to our tasty_bytes_data_app_demo role
GRANT USAGE ON WAREHOUSE tasty_ml_app_wh TO ROLE tasty_bytes_data_ml_app_demo;
GRANT USAGE ON DATABASE frostbyte_tasty_bytes_ml_app TO ROLE tasty_bytes_data_ml_app_demo;
GRANT USAGE ON SCHEMA frostbyte_tasty_bytes_ml_app.analytics TO ROLE tasty_bytes_data_ml_app_demo;
GRANT USAGE ON SCHEMA frostbyte_tasty_bytes_ml_app.harmonized TO ROLE tasty_bytes_data_ml_app_demo;
GRANT USAGE ON SCHEMA frostbyte_tasty_bytes_ml_app.raw TO ROLE tasty_bytes_data_ml_app_demo;
GRANT SELECT ON ALL VIEWS IN SCHEMA frostbyte_tasty_bytes_ml_app.analytics TO ROLE tasty_bytes_data_ml_app_demo;
GRANT SELECT ON ALL VIEWS IN SCHEMA frostbyte_tasty_bytes_ml_app.harmonized TO ROLE tasty_bytes_data_ml_app_demo;
GRANT SELECT ON ALL TABLES IN SCHEMA frostbyte_tasty_bytes_ml_app.analytics TO ROLE tasty_bytes_data_ml_app_demo;
GRANT SELECT ON ALL TABLES IN SCHEMA frostbyte_tasty_bytes_ml_app.harmonized TO ROLE tasty_bytes_data_ml_app_demo;
GRANT SELECT ON ALL TABLES IN SCHEMA frostbyte_tasty_bytes_ml_app.raw TO ROLE tasty_bytes_data_ml_app_demo;

-- use our useradmin role
USE ROLE useradmin;

-- Open the ~/.ssh/snowflake_app_key.pub file from Step 1 and copy the contents starting just after the PUBLIC KEY header,
-- and stopping just before the PUBLIC KEY footer for INSERT_RSA_PUBLIC_KEY_HERE. It should be a single line string.
CREATE USER data_ml_app_demo
RSA_PUBLIC_KEY='<INSERT_RSA_PUBLIC_KEY_HERE>'
DEFAULT_ROLE=tasty_bytes_data_ml_app_demo
DEFAULT_WAREHOUSE=tasty_ml_app_wh
MUST_CHANGE_PASSWORD=FALSE;

-- use our securityadmin role
USE ROLE securityadmin;
GRANT ROLE tasty_bytes_data_ml_app_demo TO USER data_ml_app_demo;
Overview
Tasty Bytes is aiming to achieve 25% YoY sales growth over 5 years. To support this goal and maximize daily revenue across the fleet of trucks, the data science team needs to build an ML model to direct trucks to locations that are expected to have the highest sales on a given shift.
Navigate to Worksheets, click "+" in the top-right corner to create a new Worksheet, and choose "SQL Worksheet".
Paste and run the following SQL in the worksheet to train and deploy the location recommendation model.
USE ROLE accountadmin;
USE DATABASE frostbyte_tasty_bytes_ml_app;
USE SCHEMA analytics;
USE WAREHOUSE tasty_ml_app_wh;

CREATE STAGE IF NOT EXISTS app_stage;

-- Create stored proc for shift table
CREATE OR REPLACE PROCEDURE build_shift_feature_table()
    RETURNS string
    LANGUAGE python
    RUNTIME_VERSION = '3.8'
    PACKAGES = ('snowflake-snowpark-python')
    HANDLER = 'create_table'
AS
$$
def create_table(session):
    import snowflake.snowpark.functions as F
    import snowflake.snowpark.types as T
    from snowflake.snowpark import Window

    # Create DataFrame
    snowpark_df = session.table("frostbyte_tasty_bytes_ml_app.analytics.shift_sales_v")

    # Create rolling average
    window_by_location_all_days = (
    Window.partition_by("location_id", "shift")
    .order_by("date")
    .rows_between(Window.UNBOUNDED_PRECEDING, Window.CURRENT_ROW - 1))

    snowpark_df = snowpark_df.with_column(
    "avg_location_shift_sales",
    F.avg("shift_sales").over(window_by_location_all_days))

    # Impute
    snowpark_df = snowpark_df.fillna(value=0, subset=["avg_location_shift_sales"])

    # Encode
    snowpark_df = snowpark_df.with_column("shift", F.iff(F.col("shift") == "AM", 1, 0))

    # Get date
    date_tomorrow = snowpark_df.filter(F.col("shift_sales").is_null()).select(F.min("date")).collect()[0][0]

    # Filter
    feature_df = snowpark_df.filter(F.col("date") == date_tomorrow).drop(F.col("shift_sales"))

    # Get Location Detail
    location_df = session.table("frostbyte_tasty_bytes_ml_app.analytics.shift_sales_v").select("location_id", "location_name", "street_address")

    # Join
    feature_df = feature_df.join(location_df,
                    feature_df.location_id == location_df.location_id,
                    "left") \
                    .drop(location_df.location_id) \
                    .drop(location_df.location_name) \
                    .drop(location_df.street_address) \
                    .rename(feature_df.location_id, "location_id") \
                    .rename(feature_df.location_name, "location_name") \
                    .rename(feature_df.street_address, "street_address")

    # Save table
    feature_df.write.mode("overwrite").save_as_table("frostbyte_tasty_bytes_ml_app.analytics.shift_features")

    return "SUCCESS"
$$;

-- Call sproc to create feature table
Call build_shift_feature_table();

-- Set permissions
GRANT ALL PRIVILEGES ON TABLE frostbyte_tasty_bytes_ml_app.analytics.shift_features to tasty_bytes_data_ml_app_demo;

-- Create training stored procedure
CREATE OR REPLACE PROCEDURE SPROC_TRAIN_LINREG()
    RETURNS STRING
    LANGUAGE PYTHON
    RUNTIME_VERSION = '3.8'
    PACKAGES = ('snowflake-snowpark-python','scikit-learn','joblib')
    HANDLER = 'train_model'
AS
$$
def train_model(session):
    import snowflake.snowpark.functions as F
    import snowflake.snowpark.types as T
    from snowflake.snowpark import Window

    # Create DataFrame
    snowpark_df = session.table("frostbyte_tasty_bytes_ml_app.analytics.shift_sales_v")

    # Create rolling average
    window_by_location_all_days = (
    Window.partition_by("location_id", "shift")
    .order_by("date")
    .rows_between(Window.UNBOUNDED_PRECEDING, Window.CURRENT_ROW - 1))

    snowpark_df = snowpark_df.with_column(
    "avg_location_shift_sales",
    F.avg("shift_sales").over(window_by_location_all_days))

    # Impute
    snowpark_df = snowpark_df.fillna(value=0, subset=["avg_location_shift_sales"])

    # Encode
    snowpark_df = snowpark_df.with_column("shift", F.iff(F.col("shift") == "AM", 1, 0))

    # Get date
    date_tomorrow = snowpark_df.filter(F.col("shift_sales").is_null()).select(F.min("date")).collect()[0][0]

    # Filter to historical
    historical_snowpark_df = snowpark_df.filter(F.col("shift_sales").is_not_null())

    # Drop
    historical_snowpark_df = historical_snowpark_df.drop("location_id", "city", "date")

    # Split
    train_snowpark_df, test_snowpark_df = historical_snowpark_df.randomSplit([0.8, 0.2])

    # Import packages
    from sklearn.linear_model import LinearRegression
    from joblib import dump

    feature_cols = ["MONTH", "DAY_OF_WEEK", "LATITUDE", "LONGITUDE", "CITY_POPULATION", "AVG_LOCATION_SHIFT_SALES", "SHIFT"]
    target_col = "SHIFT_SALES"

    # Get training data
    df = train_snowpark_df.to_pandas()

    # Set inputs X and outputs y
    X = df[feature_cols]
    y = df[target_col]

    # Train model
    model = LinearRegression().fit(X, y)

    # Save model
    model_name = "linreg_location_sales_model.sav"
    dump(model, "/tmp/" + model_name)
    session.file.put(
        "/tmp/" + model_name,
        "@APP_STAGE",
        auto_compress=False,
        overwrite=True
    )

    return "SUCCESS"
$$;

-- Train model
Call sproc_train_linreg();

-- Deploy the model as a UDF
CREATE OR REPLACE
  FUNCTION udf_predict_location_sales_prod(arg1 FLOAT,arg2 FLOAT,
                                                  arg3 FLOAT,arg4 FLOAT,
                                                  arg5 FLOAT,arg6 FLOAT,
                                                  arg7 FLOAT)
    RETURNS FLOAT
    LANGUAGE PYTHON
    RUNTIME_VERSION=3.8
    IMPORTS=('@APP_STAGE/linreg_location_sales_model.sav')
    PACKAGES=('scikit-learn','joblib','cloudpickle==2.0.0','pandas', 'cachetools')
    HANDLER='predict'
    as
$$
import pandas
import cachetools
from _snowflake import vectorized

@cachetools.cached(cache={})
def load_model(filename):
    import joblib
    import sys
    import os

    import_dir = sys._xoptions.get("snowflake_import_directory")
    if import_dir:
        with open(os.path.join(import_dir, filename), 'rb') as file:
            m = joblib.load(file)
            return m

@vectorized(input=pandas.DataFrame)
def predict(X: pandas.DataFrame) -> pandas.Series:
    # Load the model
    model = load_model("linreg_location_sales_model.sav")

    # Get predictions
    predictions = model.predict(X)

    # Return rounded predictions
    return predictions.round(2)
$$;

-- Set permissions
GRANT ALL PRIVILEGES ON FUNCTION udf_predict_location_sales_prod(FLOAT,FLOAT,FLOAT, FLOAT,FLOAT,FLOAT,FLOAT) to tasty_bytes_data_ml_app_demo;
The application you will be running is written in React Native.
Step 1: Get the Source Code
- Clone the repo using
git clone https://github.com/sf-gh-sjasti/IntegrationTastyBytesMLModelInDataApp.git reactNativeMLApp - Navigate to the folder,
cd reactNativeMLApp - Run
npm installto install dependancies
Step 2: Configure the application
- Open the
reactNativeMLAppfolder in VS Code or IDE of your choice. - Open the
.envfile and updatePRIVATE_KEYvalue with the private key. Copy and paste the whole private key from~/.ssh/snowflake_app_keyincluding header(-----BEGIN RSA PRIVATE KEY-----) and footer(-----END RSA PRIVATE KEY-----). - If you are located in us-west region, Update
SNOWFLAKE_ACCOUNT_IDENTIFIERwith your Snowflake Account locator. If you are located outside the us-west region, UpdateSNOWFLAKE_ACCOUNT_IDENTIFIERasSNOWFLAKE_ACCOUNT_LOCATOR.CLOUD_REGION. You can get the Account Identifier from the Account URL. - Update
SNOWFLAKE_ACCOUNTwith your Snowflake Account Locator. - Update
PUBLIC_KEY_FINGERPRINTwith your user Public Key FingerPrint. To get Public Key Fingerprint, Run the following SQL in SnowsightDESCRIBE USER data_app_demoand get RSA_PUBLIC_KEY_FP property value.
Step 3: Review the Source Code
We are using Key Pair Authentication to authenticate with Snowflake using SQL API. You can refer to the Tokens.js to understand how we are generating the JWT token. Locations.js has the source code to render Locations screen. You can also refer to this file to find out how to query UDF using SQL API and the headers needed.
Step 4: Test the application
- Run
npx expo start --clearand hitwkey to run the app in a web browser. If you are encountering "Error: error:0308010C:digital envelope routines::unsupported", Runexport NODE_OPTIONS=--openssl-legacy-provider - This launches the app in Web Browser
- Upon Launch, You can see the InQueue Orders Screen,

Navigate to Snowsight Worksheets, click "+" in the top-right corner to create a new Worksheet, and choose "SQL Worksheet". Paste and run the following SQL in the worksheet to drop Snowflake objects created in the Quickstart.
USE ROLE accountadmin;
DROP DATABASE frostbyte_tasty_bytes_ml_app;
DROP WAREHOUSE tasty_ml_app_wh;

USE ROLE securityadmin;
DROP USER data_ml_app_demo;
DROP ROLE tasty_bytes_data_ml_app_demo;
Conclusion
You did it! You have successfully completed the Integrating Tasty Bytes Location Recommendations ML model into the React Native Data Application Quickstart.
By doing so you have learned:
- Acquired third-party data from the Snowflake Marketplace
- Trained a ML model in Snowflake with a stored procedure
- Deployed ML model as a UDF in Snowflake for model inference
- Integrated ML model into the Data App
Next Steps
To learn more about Location Recommendations ML model, Please refer to our Tasty Bytes - Snowpark 101 for Data Science quickstarts.
To continue your journey in the Snowflake Data Cloud, please visit the link below to see more Tasty Bytes - Quickstarts available to you.