Snowflake's Snowpipe streaming capabilities are designed for rowsets with variable arrival frequency. It focuses on lower latency and cost for smaller data sets. This helps data workers stream rows into Snowflake without requiring files with a more attractive cost/latency profile.
Here are some of the use cases that can benefit from Snowpipe streaming:
- IoT time-series data ingestion
- CDC streams from OLTP systems
- Log ingestion from SIEM systems
- Ingestion into ML feature stores
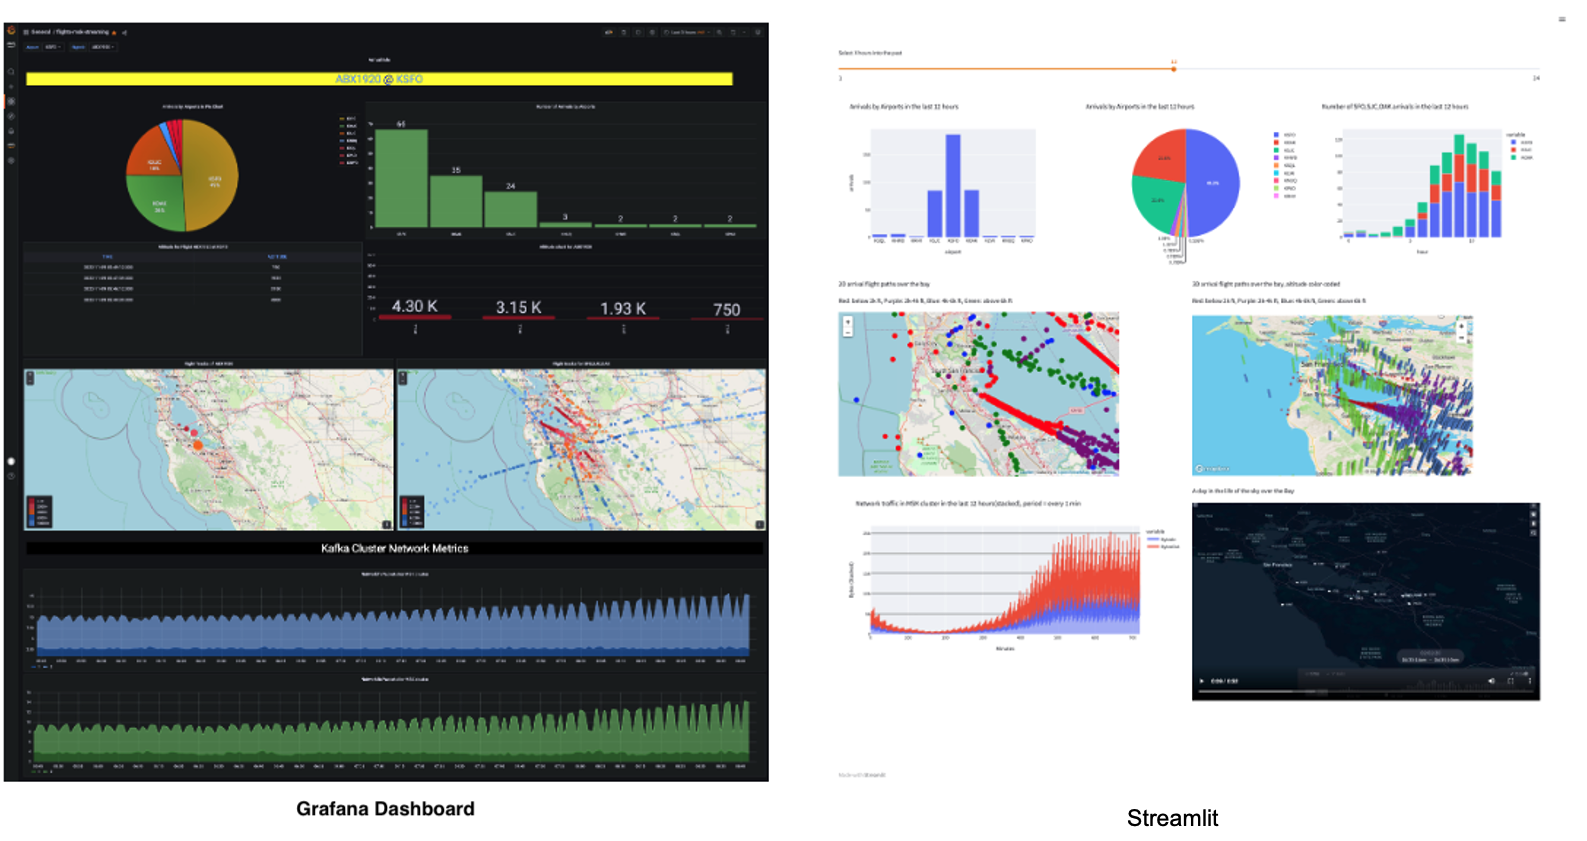
In our demo, we will use real-time commercial flight data over the San Francisco Bay Area from the Opensky Network to illustrate the solution using Snowflake's Snowpipe streaming and Azure Event Hubs.
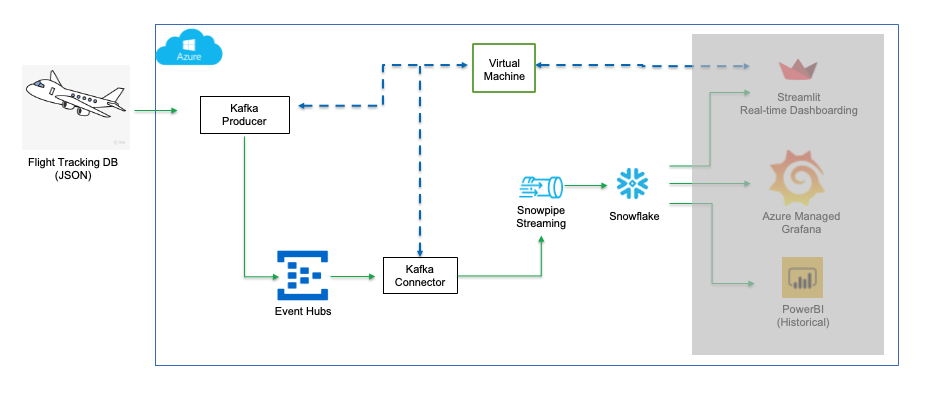
The architecture diagram below shows the deployment. An Azure Event Hub and an Azure Linux Virtual Machine (jumphost) will be provisioned in an Azure Virtual Network. The Linux jumphost will host the Kafka producer and Snowpipe streaming via Kafka Connect.
The Kafka producer calls the data sources' REST API and receives time-series data in JSON format. This data is then ingested into the Kafka cluster before being picked up by the Snowflake Connector for Kafka and delivered to a Snowflake table. The data in Snowflake table can be visualized in real-time with Azure Managed Grafana and Streamlit The historical data can also be analyzed by BI tools like Microsoft Power BI on Azure.
Prerequisites
- Familiarity with Snowflake, basic SQL knowledge, Snowsight UI and Snowflake objects
- Familiarity with Azure Services, Networking and the Management Console
- Basic knowledge of Python and Linux shell scripting
What You'll Need Before the Lab
To participate in the virtual hands-on lab, attendees need the following resources.
- A Snowflake Enterprise Account on Azure with
ACCOUNTADMINaccess - An Azure Account with administrator privileges.
What You'll Learn
- Using Azure Event Hubs.
- Using SnowSQL, the command line client for connecting to Snowflake to execute SQL queries and perform all DDL and DML operations, including loading data into and unloading data out of database tables.
- Using Snowflake to query tables populated with time-series data
What You'll Build
- Create an Azure Event Hub
- Create Kafka producers and connectors
- Create an Event hub (Kafka topic) for data streaming
- A Snowflake database to receive real-time flight data
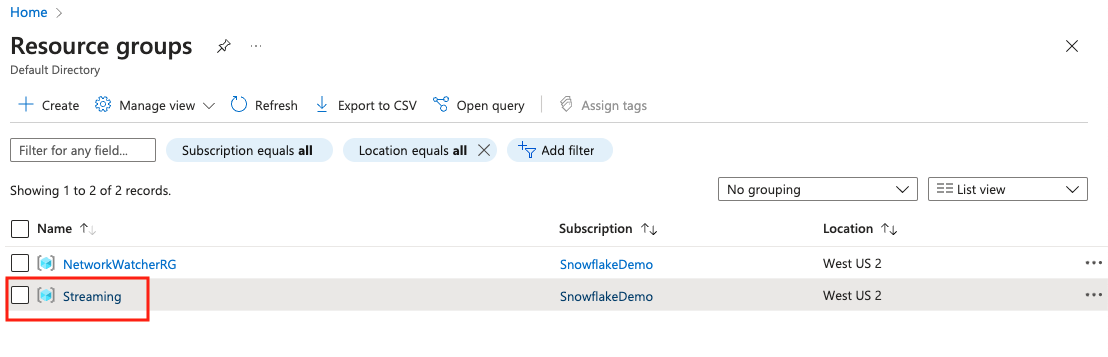
1. Create a resource group
Follow this Azure doc to create a resource group, say Streaming.
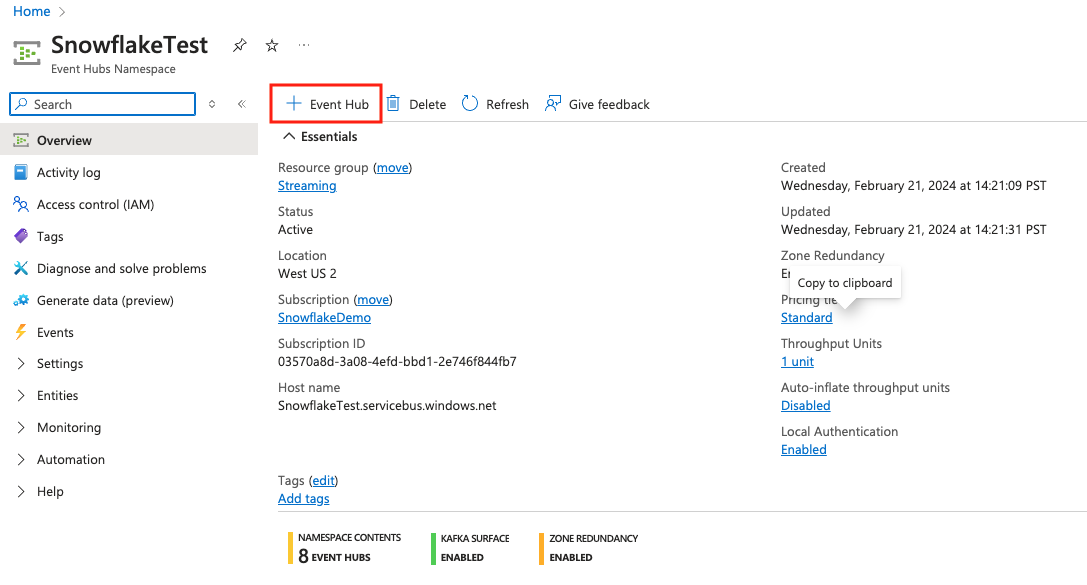
2. Create an Event Hub in the resource group
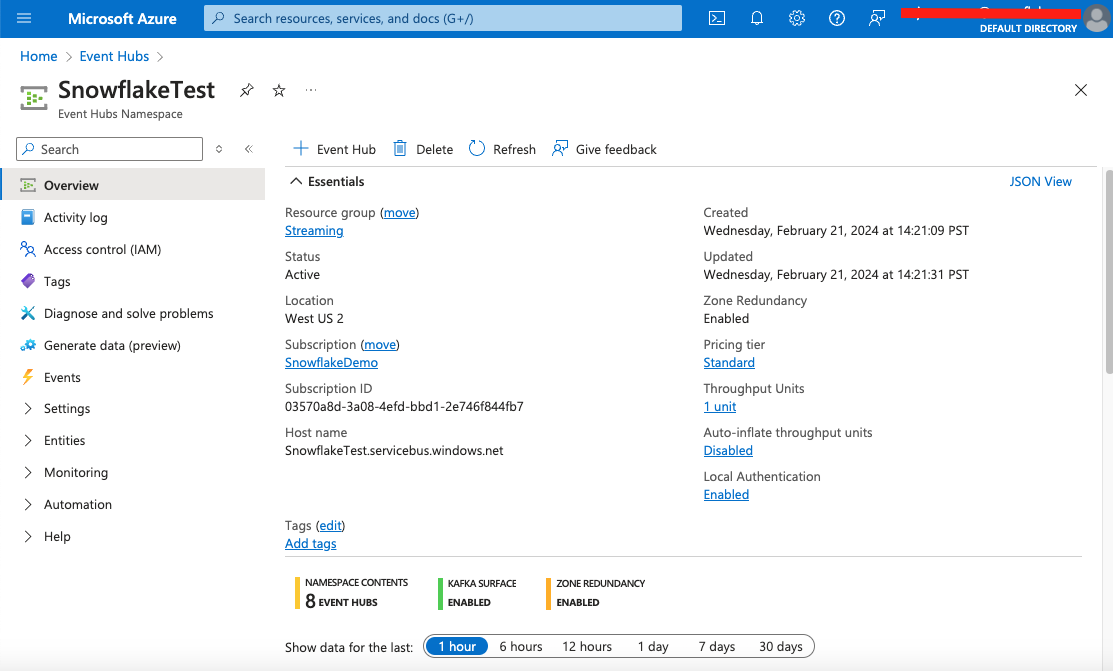
Go to the newly created resource group, and click + Create tab to create an event hub by following this Azure doc. Select the Standard pricing tier to use Apache Kafka. Make sure that you select public access to the Event Hub in the networking setting.
See below sample screen capture for reference, here we have created a namespace called SnowflakeTest.
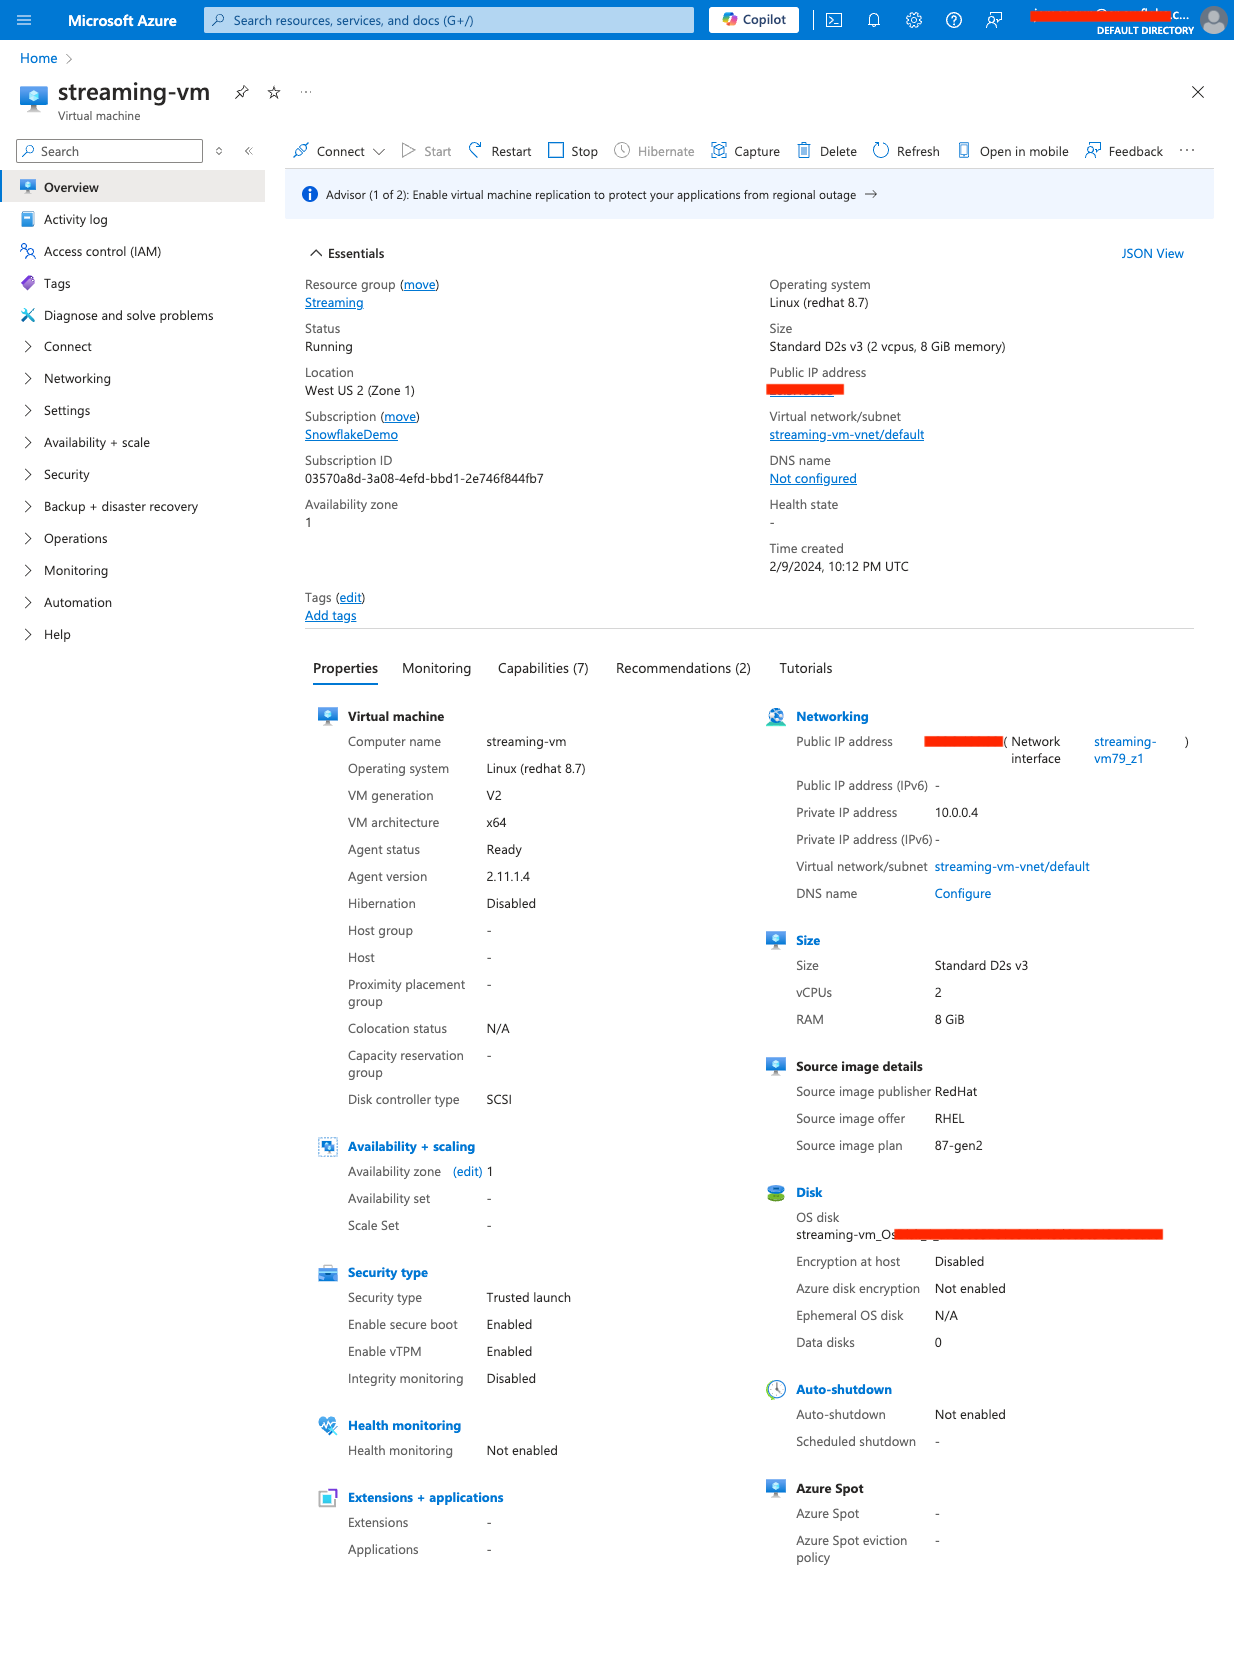
3. Create a Linux VM
In the same resource group, create a Linux(Red Hat enterprise) virtual machine by following this doc. Choose Redhat Enterprise as the image. Note that this quickstart guide was written using scripts based on the RedHat syntax, optionally you can select Ubuntu or other Linux distributions but will need to modify the scripts.
Also make sure that you allow ssh access to the VM in the network rule setting.
Download and save the private key for use in the next step.
Once the VM is provisioned, we will then use it to run the Kafka connector with Snowpipe streaming SDK and the producer. We will be using the default VM user azureuser for this workshop.
Here is a screen capture of the VM overview for reference.
4. Connect to the Linux VM console
From you local machine, either using a ssh application such as Putty if you have a Windows PC or simply the ssh CLI (ssh -i for Linux or Mac based systems.
5. Create a key-pair to be used for authenticating with Snowflake
Create a key pair in the VM console by executing the following commands. You will be prompted to give an encryption password, remember this phrase, you will need it later.
cd $HOME
openssl genrsa 2048 | openssl pkcs8 -topk8 -inform PEM -out rsa_key.p8
See below example screenshot:

Next we will create a public key by running following commands. You will be prompted to type in the phrase you used in above step.
openssl rsa -in rsa_key.p8 -pubout -out rsa_key.pub
see below example screenshot:

Next we will print out the public key string in a correct format that we can use for Snowflake.
grep -v KEY rsa_key.pub | tr -d '\n' | awk '{print $1}' > pub.Key
cat pub.Key
see below example screenshot:

6. Install the Kafka connector for Snowpipe streaming
Run the following command to install the Kafka connector and Snowpipe streaming SDK
passwd=changeit  # Use the default password for the Java keystore, you should change it after finishing the lab
directory=/home/azureuser/snowpipe-streaming # Installation directory

cd $HOME
mkdir -p $directory
cd $directory
pwd=`pwd`
sudo yum clean all
sudo yum -y install openssl vim-common java-1.8.0-openjdk-devel.x86_64 gzip tar jq python3-pip
wget https://archive.apache.org/dist/kafka/2.8.1/kafka_2.12-2.8.1.tgz
tar xvfz kafka_2.12-2.8.1.tgz -C $pwd
rm -rf $pwd/kafka_2.12-2.8.1.tgz
cd /tmp && cp /usr/lib/jvm/java-openjdk/jre/lib/security/cacerts kafka.client.truststore.jks
cd /tmp && keytool -genkey -keystore kafka.client.keystore.jks -validity 300 -storepass $passwd -keypass $passwd -dname "CN=snowflake.com" -alias snowflake -storetype pkcs12

#Snowflake kafka connector
wget https://repo1.maven.org/maven2/com/snowflake/snowflake-kafka-connector/2.2.1/snowflake-kafka-connector-2.2.1.jar -O $pwd/kafka_2.12-2.8.1/libs/snowflake-kafka-connector-2.2.1.jar

#Snowpipe streaming SDK
wget https://repo1.maven.org/maven2/net/snowflake/snowflake-ingest-sdk/2.1.0/snowflake-ingest-sdk-2.1.0.jar -O $pwd/kafka_2.12-2.8.1/libs/snowflake-ingest-sdk-2.1.0.jar
wget https://repo1.maven.org/maven2/net/snowflake/snowflake-jdbc/3.14.5/snowflake-jdbc-3.14.5.jar -O $pwd/kafka_2.12-2.8.1/libs/snowflake-jdbc-3.14.5.jar
wget https://repo1.maven.org/maven2/org/bouncycastle/bc-fips/1.0.1/bc-fips-1.0.1.jar -O $pwd/kafka_2.12-2.8.1/libs/bc-fips-1.0.1.jar
wget https://repo1.maven.org/maven2/org/bouncycastle/bcpkix-fips/1.0.3/bcpkix-fips-1.0.3.jar -O $pwd/kafka_2.12-2.8.1/libs/bcpkix-fips-1.0.3.jar
Note that the version numbers for Kafka, the Snowflake Kafka connector, and the Snowpipe Streaming SDK are dynamic, as new versions are continually published. We are using the version numbers that have been validated to work.
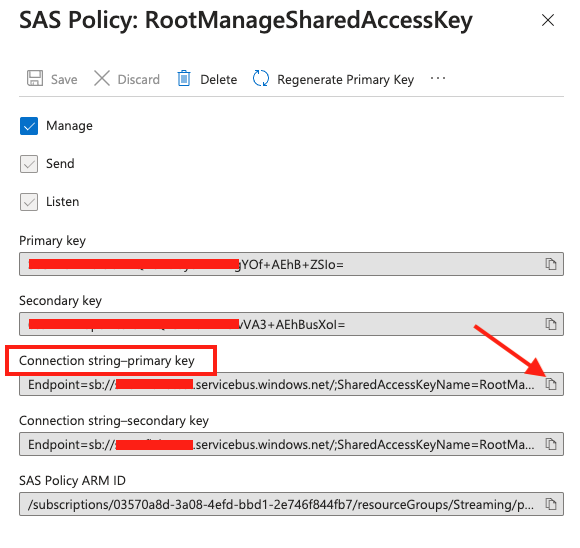
7. Retrieve the connection string
Go to the Event Hubs console, select the namespace you just created, then select Settings and Shared access policies on the left pane and click RootManageSharedAccessKey policy. Then copy the Connection string-primary key, see screenshot below.
See example screenshot below.
Now switch back to the VM console and execute the following command by replacing
export CS="<connection string>"
see the example screen capture below. 
We also need to extract the kafka broker string(BS) from the connection string by running this command:
export BS=`echo $CS | awk -F\/ '{print $3":9093"}'`
Now run the following command to add CS as an environment variable so it is recognized across the Linux sessions.
echo "export CS=\"$CS\"" >> ~/.bashrc
echo "export BS=$BS" >> ~/.bashrc
8. Create a configuration file for the Kafka connector
Run the following commands to generate a configuration file connect-standalone.properties in directory /home/azureuser/snowpipe-streaming/scripts for the client to authenticate with the Event hubs namespace.
dir=/home/azureuser/snowpipe-streaming/scripts
mkdir -p $dir && cd $dir
cat << EOF > $dir/connect-standalone.properties
#************CREATING SNOWFLAKE Connector****************
bootstrap.servers=$BS

#************SNOWFLAKE VALUE CONVERSION****************
key.converter=org.apache.kafka.connect.storage.StringConverter
value.converter=com.snowflake.kafka.connector.records.SnowflakeJsonConverter
key.converter.schemas.enable=true
value.converter.schemas.enable=true
#************SNOWFLAKE ****************

offset.storage.file.filename=/tmp/connect.offsets
# Flush much faster than normal, which is useful for testing/debugging
offset.flush.interval.ms=10000

# required EH Kafka security settings
security.protocol=SASL_SSL
sasl.mechanism=PLAIN
sasl.jaas.config=org.apache.kafka.common.security.plain.PlainLoginModule required username="\$ConnectionString" password="$CS";
consumer.security.protocol=SASL_SSL
consumer.sasl.mechanism=PLAIN
consumer.sasl.jaas.config=org.apache.kafka.common.security.plain.PlainLoginModule required username="\$ConnectionString" password="$CS";
plugin.path=/home/azureuser/snowpipe-streaming/kafka_2.12-2.8.1/libs
EOF
A configuration file connect-standalone.properties is created in directory /home/azureuser/snowpipe-streaming/scripts
9. Create a security configuration file for the producer
Run the following commands to create a security configuration file client.properties.
dir=/home/azureuser/snowpipe-streaming/scripts
cat << EOF > $dir/client.properties
# required EH Kafka security settings
security.protocol=SASL_SSL
sasl.mechanism=PLAIN
sasl.jaas.config=org.apache.kafka.common.security.plain.PlainLoginModule required username="\$ConnectionString" password="$CS";
EOF
A configuration file client.properties is created in directory /home/azureuser/snowpipe-streaming/scripts
10. Create an event hub in the namespace
Go to the Event Hubs namespace and clicke + Event Hub.
Give the event hub a name, say streaming, then click Next: Capture.
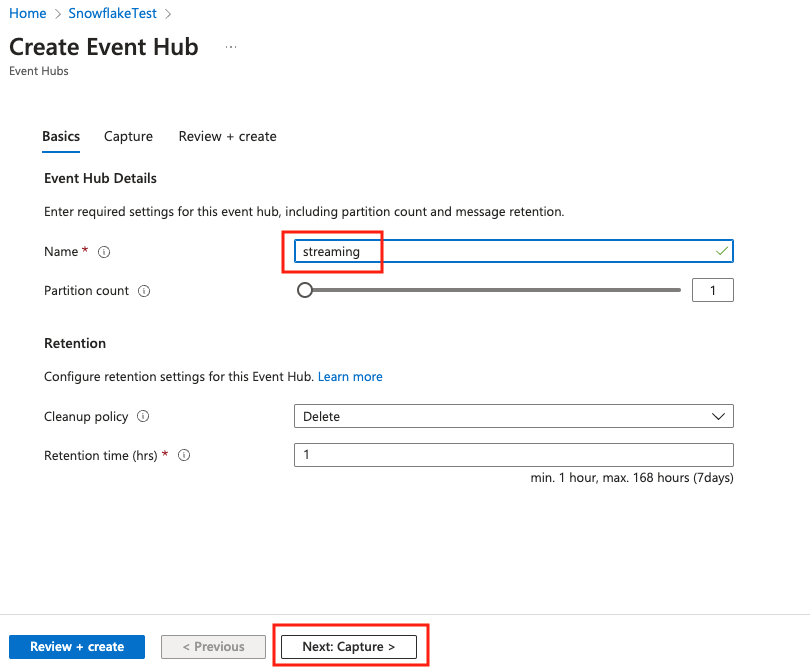
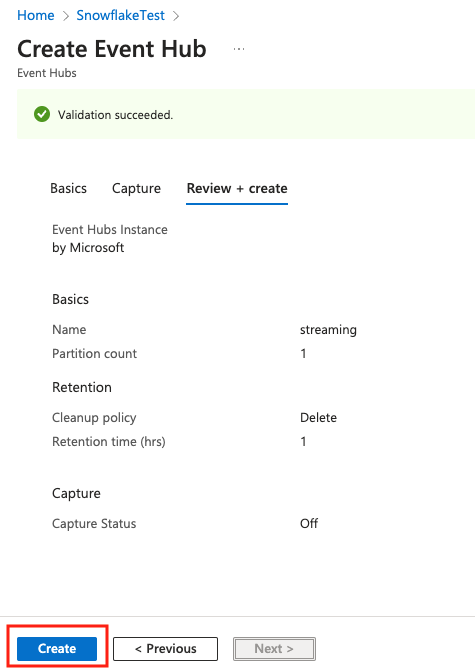
Leave everything as default, and click Next: Review + create.
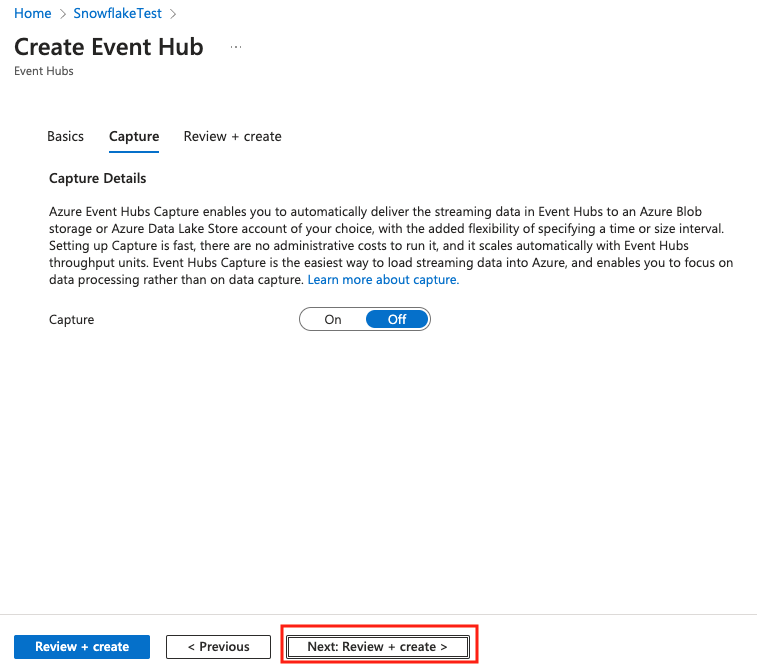
Click Create to create the event hub.
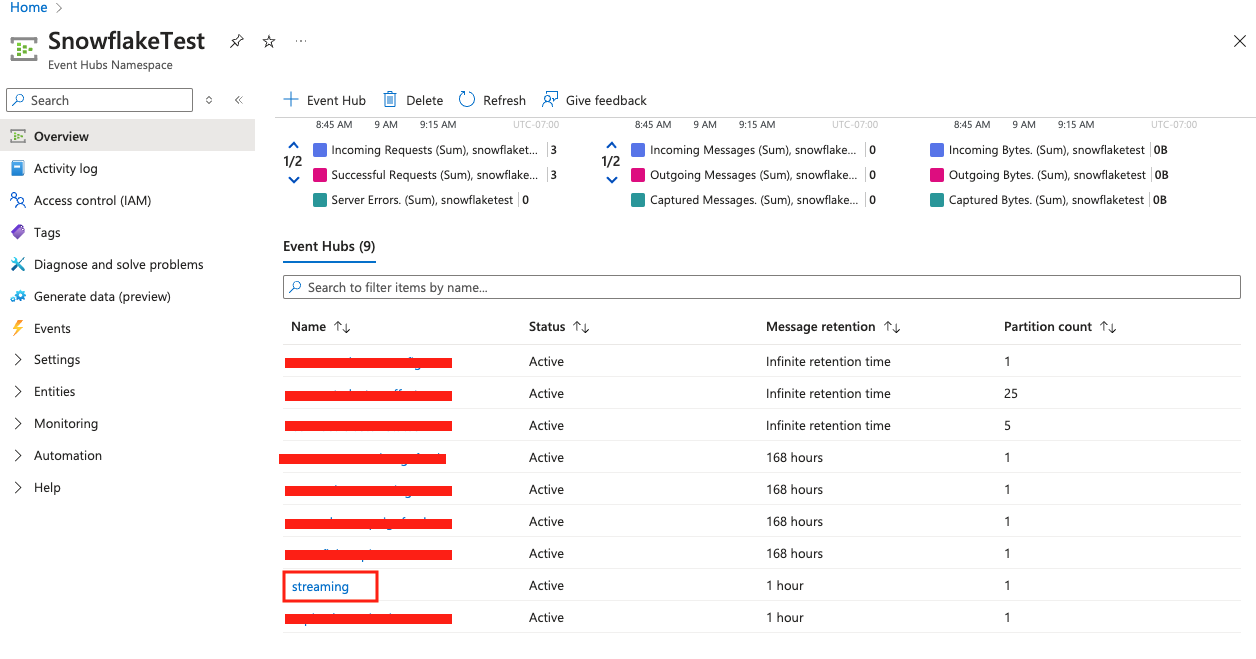
Scroll down to the list of event hubs, you will see the streaming event hub there.
To describe the topic, run the following commands in the VM shell:
$HOME/snowpipe-streaming/kafka_2.12-2.8.1/bin/kafka-topics.sh --bootstrap-server $BS --command-config $HOME/snowpipe-streaming/scripts/client.properties --describe --topic streaming
See below example screenshot:

1. Creating user, role, and database
First login to your Snowflake account as a power user with ACCOUNTADMIN role. Then run the following SQL commands in a worksheet to create a user, database and the role that we will use in the lab.
-- Set default value for multiple variables
-- For purpose of this workshop, it is recommended to use these defaults during the exercise to avoid errors
-- You should change them after the workshop
SET PWD = 'Test1234567';
SET USER = 'STREAMING_USER';
SET DB = 'AZ_STREAMING_DB';
SET WH = 'AZ_STREAMING_WH';
SET ROLE = 'AZ_STREAMING_RL';

USE ROLE ACCOUNTADMIN;

-- CREATE USERS
CREATE USER IF NOT EXISTS IDENTIFIER($USER) PASSWORD=$PWD  COMMENT='STREAMING USER';

-- CREATE ROLES
CREATE OR REPLACE ROLE IDENTIFIER($ROLE);

-- CREATE DATABASE AND WAREHOUSE
CREATE DATABASE IF NOT EXISTS IDENTIFIER($DB);
USE IDENTIFIER($DB);
CREATE OR REPLACE WAREHOUSE IDENTIFIER($WH) WITH WAREHOUSE_SIZE = 'SMALL';

-- GRANTS
GRANT CREATE WAREHOUSE ON ACCOUNT TO ROLE IDENTIFIER($ROLE);
GRANT ROLE IDENTIFIER($ROLE) TO USER IDENTIFIER($USER);
GRANT OWNERSHIP ON DATABASE IDENTIFIER($DB) TO ROLE IDENTIFIER($ROLE);
GRANT USAGE ON WAREHOUSE IDENTIFIER($WH) TO ROLE IDENTIFIER($ROLE);

-- SET DEFAULTS
ALTER USER IDENTIFIER($USER) SET DEFAULT_ROLE=$ROLE;
ALTER USER IDENTIFIER($USER) SET DEFAULT_WAREHOUSE=$WH;


-- RUN FOLLOWING COMMANDS TO FIND YOUR ACCOUNT IDENTIFIER, COPY IT DOWN FOR USE LATER
-- IT WILL BE SOMETHING LIKE <organization_name>-<account_name>
-- e.g. ykmxgak-wyb52636

WITH HOSTLIST AS
(SELECT * FROM TABLE(FLATTEN(INPUT => PARSE_JSON(SYSTEM$allowlist()))))
SELECT REPLACE(VALUE:host,'.snowflakecomputing.com','') AS ACCOUNT_IDENTIFIER
FROM HOSTLIST
WHERE VALUE:type = 'SNOWFLAKE_DEPLOYMENT_REGIONLESS';
Please write down the Account Identifier, we will need it later. 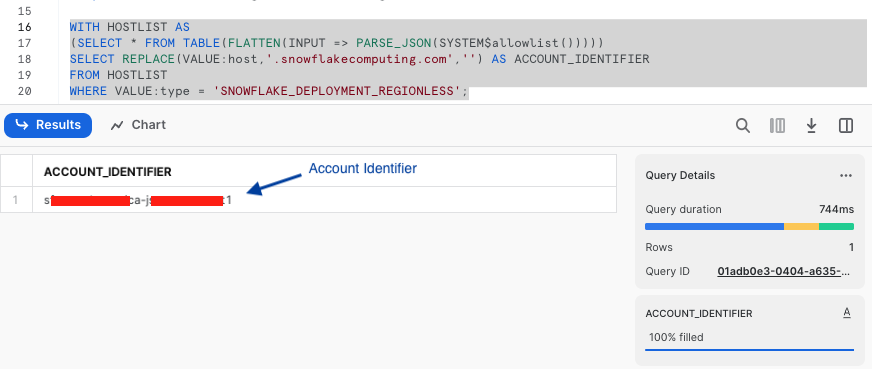
Next we need to configure the public key for the streaming user to access Snowflake programmatically.
First, in the Snowflake worksheet, replace < pubKey > with the content of the file /home/azureuser/pub.Key (see step 5 by clicking on section #2 Create an Event Hub and a Linux virtual machine in Azure cloud in the left pane) in the following SQL command and execute.
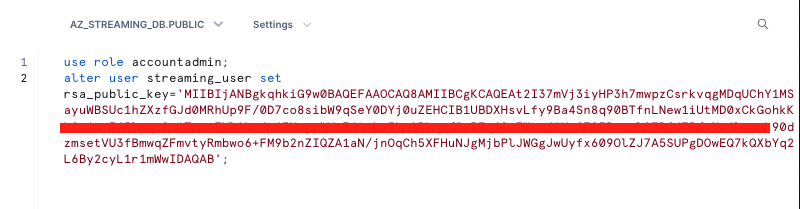
use role accountadmin;
alter user streaming_user set rsa_public_key='< pubKey >';
See below example screenshot:
Now logout of Snowflake, sign back in as the default user streaming_user we just created with the associated password (default: Test1234567). Run the following SQL commands in a worksheet to create a schema (e.g. AZ_STREAMING_SCHEMA) in the default database (e.g. AZ_STREAMING_DB):
SET DB = 'AZ_STREAMING_DB';
SET SCHEMA = 'AZ_STREAMING_SCHEMA';

USE IDENTIFIER($DB);
CREATE OR REPLACE SCHEMA IDENTIFIER($SCHEMA);
2. Install SnowSQL (optional but highly recommended)
This step is optional for this workshop but is highly recommended if you prefer to use the CLI to interact with Snowflake later instead of the web console.
SnowSQL is the command line client for connecting to Snowflake to execute SQL queries and perform all DDL and DML operations, including loading data into and unloading data out of database tables.
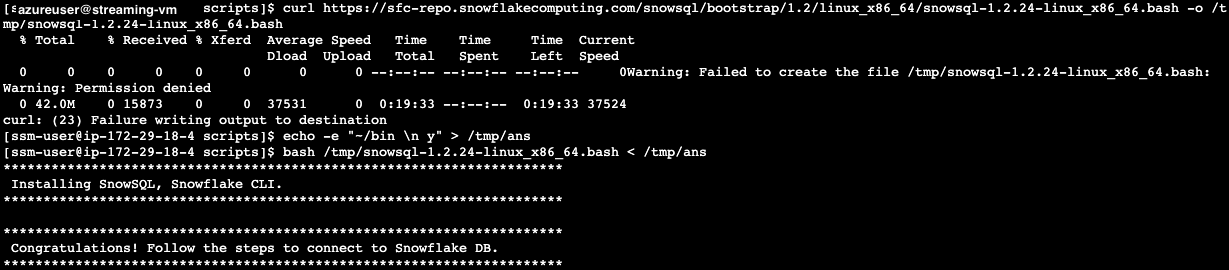
To install SnowSQL. Execute the following commands on the Linux Session Manager console:
curl https://sfc-repo.snowflakecomputing.com/snowsql/bootstrap/1.2/linux_x86_64/snowsql-1.2.24-linux_x86_64.bash -o /tmp/snowsql-1.2.24-linux_x86_64.bash
echo -e "~/bin \n y" > /tmp/ans
bash /tmp/snowsql-1.2.24-linux_x86_64.bash < /tmp/ans
See below example screenshot:
Next set the environment variable for Snowflake Private Key Phrase:
export SNOWSQL_PRIVATE_KEY_PASSPHRASE=<key phrase you set up when running openssl previously>
Note that you should add the command above in the ~/.bashrc file to preserve this environment variable across sessions.
echo "export SNOWSQL_PRIVATE_KEY_PASSPHRASE=$SNOWSQL_PRIVATE_KEY_PASSPHRASE" >> ~/.bashrc
Now you can execute this command to interact with Snowflake:
$HOME/bin/snowsql -a <Snowflake Account Identifier> -u streaming_user --private-key-path $HOME/rsa_key.p8 -d az_streaming_db -s az_streaming_schema
Type Ctrl-D to get out of SnowSQL session.
You can edit the ~/.snowsql/config file to set default parameters and eliminate the need to specify them every time you run snowsql.
At this point, the Snowflake setup is complete.
1. Collect parameters for the Kafka connector
Run the following commands to collect various connection parameters for the Kafka connector.
cd $HOME
outf=/tmp/params
cat << EOF > /tmp/get_params
a=''
until [ ! -z \$a ]
do
 read -p "Input Snowflake account identifier: e.g. ylmxgak-wyb53646 ==> " a
done

echo export clstr_url=\$a.snowflakecomputing.com > $outf
export clstr_url=\$a.snowflakecomputing.com

read -p "Snowflake cluster user name: default: streaming_user ==> " user
if [[ \$user == "" ]]
then
   user="streaming_user"
fi

echo export user=\$user >> $outf
export user=\$user

pass=''
until [ ! -z \$pass ]
do
  read -p "Private key passphrase ==> " pass
done

echo export key_pass=\$pass >> $outf
export key_pass=\$pass

read -p "Full path to your Snowflake private key file, default: /home/azureuser/rsa_key.p8 ==> " p8
if [[ \$p8 == "" ]]
then
   p8="/home/azureuser/rsa_key.p8"
fi

priv_key=\`cat \$p8 | grep -v PRIVATE | tr -d '\n'\`
echo export priv_key=\$priv_key  >> $outf
export priv_key=\$priv_key
cat $outf >> $HOME/.bashrc
EOF
. /tmp/get_params
See below example screen capture.

2. Create a Snowflake Kafka connect configuration file
Run the following commands to generate a configuration file for the Kafka connector.
dir=/home/azureuser/snowpipe-streaming/scripts
cat << EOF > $dir/snowflakeconnectorAZ.properties
name=snowpipeStreaming
connector.class=com.snowflake.kafka.connector.SnowflakeSinkConnector
tasks.max=4
topics=streaming
snowflake.private.key.passphrase=$key_pass
snowflake.database.name=AZ_STREAMING_DB
snowflake.schema.name=AZ_STREAMING_SCHEMA
snowflake.topic2table.map=streaming:AZ_STREAMING_TBL
buffer.count.records=10000
buffer.flush.time=5
buffer.size.bytes=20000000
snowflake.url.name=$clstr_url
snowflake.user.name=$user
snowflake.private.key=$priv_key
snowflake.role.name=AZ_STREAMING_RL
snowflake.ingestion.method=snowpipe_streaming
snowflake.enable.schematization=false
value.converter.schemas.enable=false
jmx=true
key.converter=org.apache.kafka.connect.storage.StringConverter
valur.converter=com.snowflake.kafka.connector.records.SnowflakeJsonConverter
errors.tolerance=all
EOF
Finally, we are ready to start ingesting data into the Snowflake table.
1. Start the Kafka Connector for Snowpipe streaming
Go back to the Linux console and execute the following commands to start the Kafka connector.
$HOME/snowpipe-streaming/kafka_2.12-2.8.1/bin/connect-standalone.sh $HOME/snowpipe-streaming/scripts/connect-standalone.properties $HOME/snowpipe-streaming/scripts/snowflakeconnectorAZ.properties
If everything goes well, you should see something similar to screen capture below: 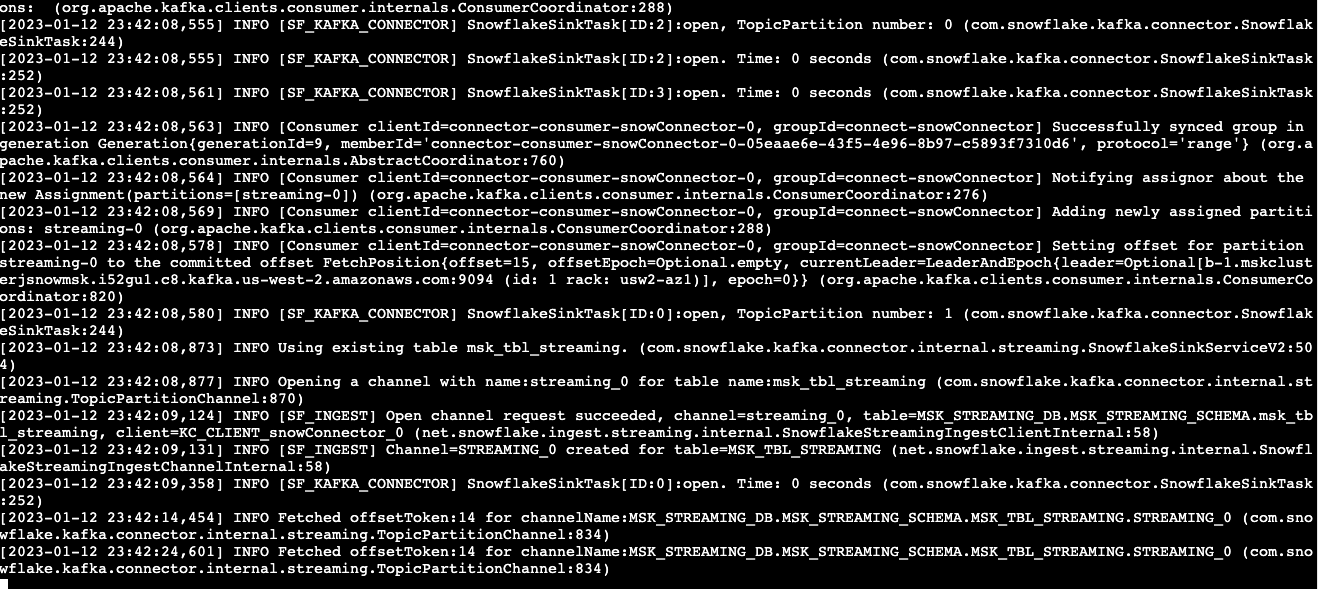
Leave this screen open and let the connector continue to run.
2. Start the producer
Open up a new ssh session connection to the VM. In the shell, run the following command:
curl --connect-timeout 5 http://ecs-alb-1504531980.us-west-2.elb.amazonaws.com:8502/opensky | $HOME/snowpipe-streaming/kafka_2.12-2.8.1/bin/kafka-console-producer.sh --broker-list $BS --producer.config $HOME/snowpipe-streaming/scripts/client.properties --topic streaming
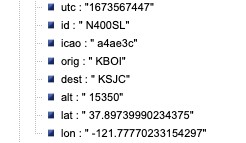
You should see response similar to screen capture below if everything works well.

Note that in the script above, the producer queries a Rest API that provides real-time flight data over the San Francisco Bay Area in JSON format. The data includes information such as timestamps, icao numbers, flight IDs, destination airport, longitude, latitude, and altitude of the aircraft, etc. The data is ingested into the streaming topic on the event hub and then picked up by the Snowpipe streaming Kafka connector, which delivers it directly into a Snowflake table az_streaming_db.az_streaming_schema.az_streaming_tbl.
Now, switch back to the Snowflake console and make sure that you signed in as the default user streaming_user. The data should have been streamed into a table, ready for further processing.
1. Query the raw data
To verify that data has been streamed into Snowflake, execute the following SQL commands.
use az_streaming_db;
use schema az_streaming_schema;
show channels in table az_streaming_tbl;
You should see that there are two channels, corresponding to the two partitions created earlier in the topic.  .
.
Note that, unlike the screen capture above, at this point, you should only see one row in the table, as we have only ingested data once. We will see new rows being added later as we continue to ingest more data.
Now run the following query on the table.
select * from az_streaming_tbl;
You should see there are two columns in the table: RECORD_METADATA and RECORD_CONTENT as shown in the screen capture below.
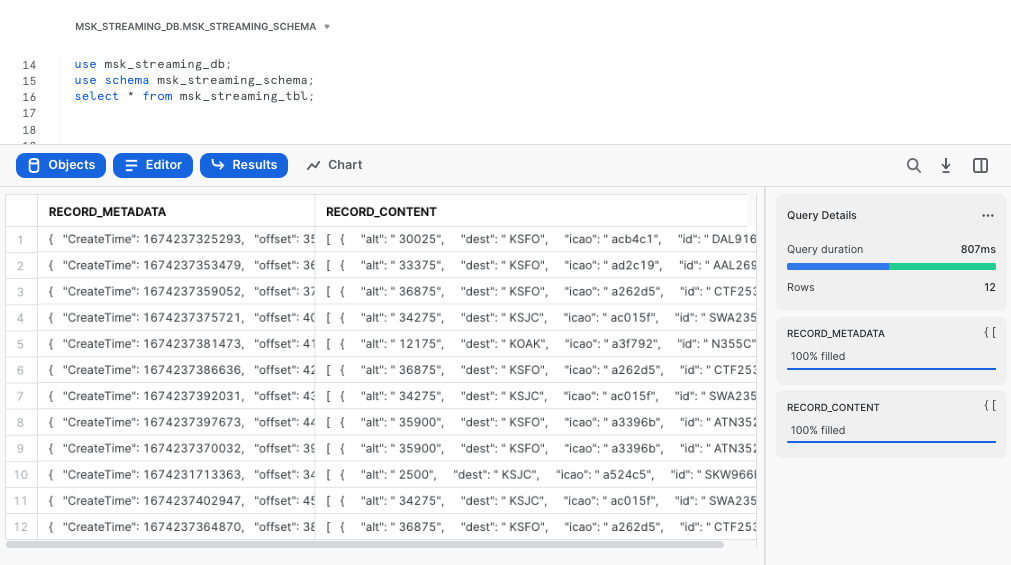 The
The RECORD_CONTENT column is an JSON array that needs to be flattened.
2. Flatten the raw JSON data
Now execute the following SQL commands to flatten the raw JSONs and create a materialized view with multiple columns based on the key names.
create or replace view flights_vw
  as select
    f.value:utc::timestamp_ntz ts_utc,
    CONVERT_TIMEZONE('UTC','America/Los_Angeles',ts_utc::timestamp_ntz) as ts_pt,
    f.value:alt::integer alt,
    f.value:dest::string dest,
    f.value:orig::string orig,
    f.value:id::string id,
    f.value:icao::string icao,
    f.value:lat::float lat,
    f.value:lon::float lon,
    st_geohash(to_geography(ST_MAKEPOINT(lon, lat)),12) geohash,
    year(ts_pt) yr,
    month(ts_pt) mo,
    day(ts_pt) dd,
    hour(ts_pt) hr
FROM   az_streaming_tbl,
       Table(Flatten(az_streaming_tbl.record_content)) f;
The SQL commands create a view, convert timestamps to different time zones, and use Snowflake's Geohash function to generate geohashes that can be used in time-series visualization tools like Grafana
Let's query the view flights_vw now.
select * from flights_vw;
As a result, you will see a nicely structured output with columns derived from the JSONs 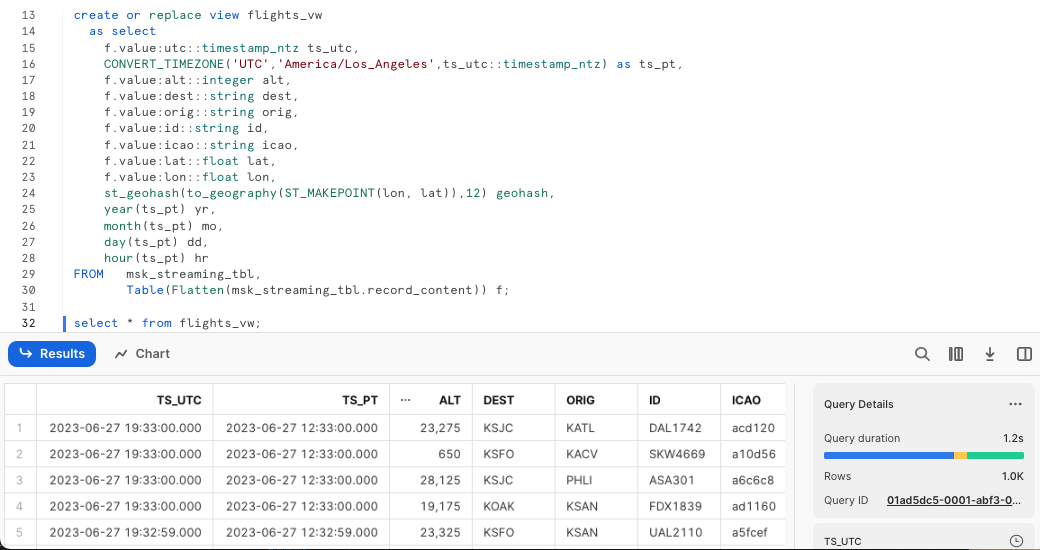
3. Stream real-time flight data continuously to Snowflake
We can now write a loop to stream the flight data continuously into Snowflake.
Go back to the Linux session and run the following script.
while true
do
  curl --connect-timeout 5 -k http://ecs-alb-1504531980.us-west-2.elb.amazonaws.com:8502/opensky | $HOME/snowpipe-streaming/kafka_2.12-2.8.1/bin/kafka-console-producer.sh --broker-list $BS --producer.config $HOME/snowpipe-streaming/scripts/client.properties --topic streaming
  sleep 10
done
You can now go back to the Snowflake worksheet to run a select count(1) from flights_vw query every 10 seconds to verify that the row counts is indeed increasing.
When you are done with the demo, to tear down the Azure resources, follow this doc to dismantle the resource group and its associated resources.
For Snowflake cleanup, execute the following SQL commands.
USE ROLE ACCOUNTADMIN;

DROP DATABASE AZ_STREAMING_DB;
DROP WAREHOUSE AZ_STREAMING_WH;
DROP ROLE AZ_STREAMING_RL;

-- Drop the streaming user
DROP USER IF EXISTS STREAMING_USER;
In this lab, we built a demo to show how to ingest time-series data using Snowpipe streaming and Kafka with low latency. We demonstrated this using an Azure event hub and the Kafka connector for Snowpipe streaming hosted on a VM. You can also containerize the connector on the Azure Kubernetes Services (AKS) to leverage the benefits of scability and manageability.
Related Resources