In this guide, you'll learn how to build a complete machine learning pipeline using Snowflake ML Jobs and Task Graphs. This end-to-end solution demonstrates how to orchestrate the entire ML lifecycle - from data preparation to model deployment - all within Snowflake's ecosystem.
The pipeline you'll build includes data preparation, model training on distributed compute, model evaluation, conditional promotion based on quality metrics, and automated cleanup - all orchestrated through a Task Graph that can be scheduled for recurring execution.
What You'll Learn
- How to set up and configure Snowflake resources for ML workloads
- How to build a complete ML pipeline using Snowpark Python
- How to orchestrate ML workflows using Snowflake Task Graphs
- How to implement conditional logic for model promotion
- How to monitor and debug Task Graph executions
What You'll Build
You'll build a complete, production-ready ML pipeline that:
- Prepares training data from a Feature Store
- Trains an XGBoost model using distributed compute on Snowpark Container Services
- Evaluates model quality against predefined thresholds
- Conditionally promotes high-quality models to production in Model Registry
- Sends notifications for important events
- Performs cleanup operations
What You'll Need
- Access to a Snowflake account
- Appropriate Snowflake role permissions (detailed in setup)
- Basic familiarity with Python and machine learning concepts
Firstly, to follow along with this quickstart, you can use the code in the e2e_task_graph GitHub repo to download the code used in this article.
Snowflake Account Setup
Work with your account administrator to provision the required resources in your Snowflake account as needed.
NOTE: The steps below use role name ENGINEER. Replace this with the role name you will be using to work through the example.
- Create a compute pool if you don't already have one:
CREATE COMPUTE POOL IF NOT EXISTS DEMO_POOL
    MIN_NODES = 1
    MAX_NODES = 2
    INSTANCE_FAMILY = CPU_X64_S;
GRANT USAGE ON COMPUTE POOL TO ROLE ENGINEER;
Note: MAX_NODES should be at least equal to target_instances (2 in this example).
- Create a virtual warehouse if you don't already have one:
CREATE WAREHOUSE IF NOT EXISTS DEMO_WH;  -- Default settings are fine
GRANT USAGE ON WAREHOUSE DEMO_WH TO ROLE ENGINEER;
- Configure database privileges for the demo. Subsequent steps will create resources inside this database.
-- OPTIONAL: Create a separate database for easy cleanup
CREATE DATABASE IF NOT EXISTS SNOWBANK;

GRANT USAGE ON DATABASE SNOWBANK TO ROLE ENGINEER;
GRANT CREATE SCHEMA ON DATABASE SNOWBANK TO ROLE ENGINEER;
- Grant other required access control privileges needed to execute the sample:
EXECUTE TASK ON ACCOUNT TO ROLE ENGINEER;
- (Optional) Configure a notification integration to enable sending notifications from Task Graph executions.
- Option 1: Email notifications
- Verify the email addresses of intended notification recipients
- Create the email notification integration
SET user_email = (SELECT EMAIL FROM SNOWFLAKE.ACCOUNT_USAGE.USERS WHERE NAME = CURRENT_USER());
CREATE OR REPLACE NOTIFICATION INTEGRATION DEMO_NOTIFICATION_INTEGRATION
    TYPE=EMAIL
    DEFAULT_RECIPIENTS = ($user_email)
    DEFAULT_SUBJECT = 'Model Training Status'
    ENABLED=TRUE;
GRANT USAGE ON INTEGRATION DEMO_NOTIFICATION_INTEGRATION TO ROLE ENGINEER;
- Option 2: Webhook notifications (e.g. Slack, Teams)
- Create a webhook with your desired notification channel (e.g. Slack Webhook)
- Configure notification integration with your webhook
CREATE SECRET IF NOT EXISTS DEMO_WEBHOOK_SECRET
    TYPE = GENERIC_STRING
    SECRET_STRING = 'T00000000/B00000000/XXXXXXXXXXXXXXXXXXXXXXXX'; -- (ACTION NEEDED) Put your webhook secret here
CREATE OR REPLACE NOTIFICATION INTEGRATION DEMO_NOTIFICATION_INTEGRATION
    TYPE=WEBHOOK
    ENABLED=TRUE
    WEBHOOK_URL='https://hooks.slack.com/services/SNOWFLAKE_WEBHOOK_SECRET'
    WEBHOOK_SECRET=DEMO_WEBHOOK_SECRET
    WEBHOOK_BODY_TEMPLATE='{"text": "SNOWFLAKE_WEBHOOK_MESSAGE"}'
    WEBHOOK_HEADERS=('Content-Type'='application/json');
GRANT USAGE ON INTEGRATION DEMO_NOTIFICATION_INTEGRATION TO ROLE ENGINEER;
- Option 1: Email notifications
Local Setup
- All steps assume your working directory is the
e2e_task_graph/foldercd samples/ml/ml_jobs/e2e_task_graph - Configure your default Snowflake connection following the connection configuration guide
Tip: You can generate a config for your account from Snowsight using the Connect a tool to Snowflake > Config File menu items. 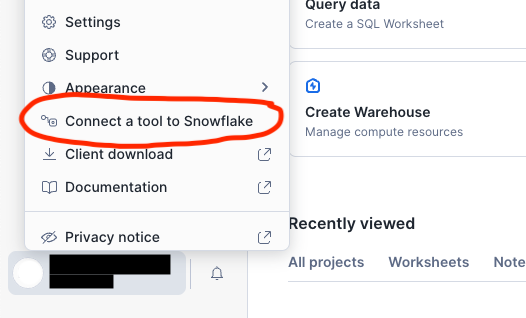

- Set up your development environments using the setup_env.sh helper script. The script will create a new virtual environment (if needed), install all the necessary Python packages, and create the necessary resources in your default Snowflake account from step 2.
Modifybash scripts/setup_env.sh -r ENGINEER # Change ENGINEER to your role name-r ENGINEERto match the role name used in Snowflake Account Setup - Update the values in constants.py to match your Snowflake environment as configured in Snowflake Account Setup and any modifications made to step 3 above.
Standalone Pipeline (Local Testing)
pipeline_local.py provides the core ML pipeline and can be executed locally for testing purposes.
The pipeline reads features from a Feature Store prepared in the previous setup step, generates train and test data splits, and runs model training using an ML Job. The pipeline concludes by evaluating the trained model and conditionally logging the trained model to Model Registry for downstream consumption.
Run the ML pipeline locally without task graph orchestration:
python src/pipeline_local.py
python src/pipeline_local.py --no-register  # Skip model registration for faster experimentation
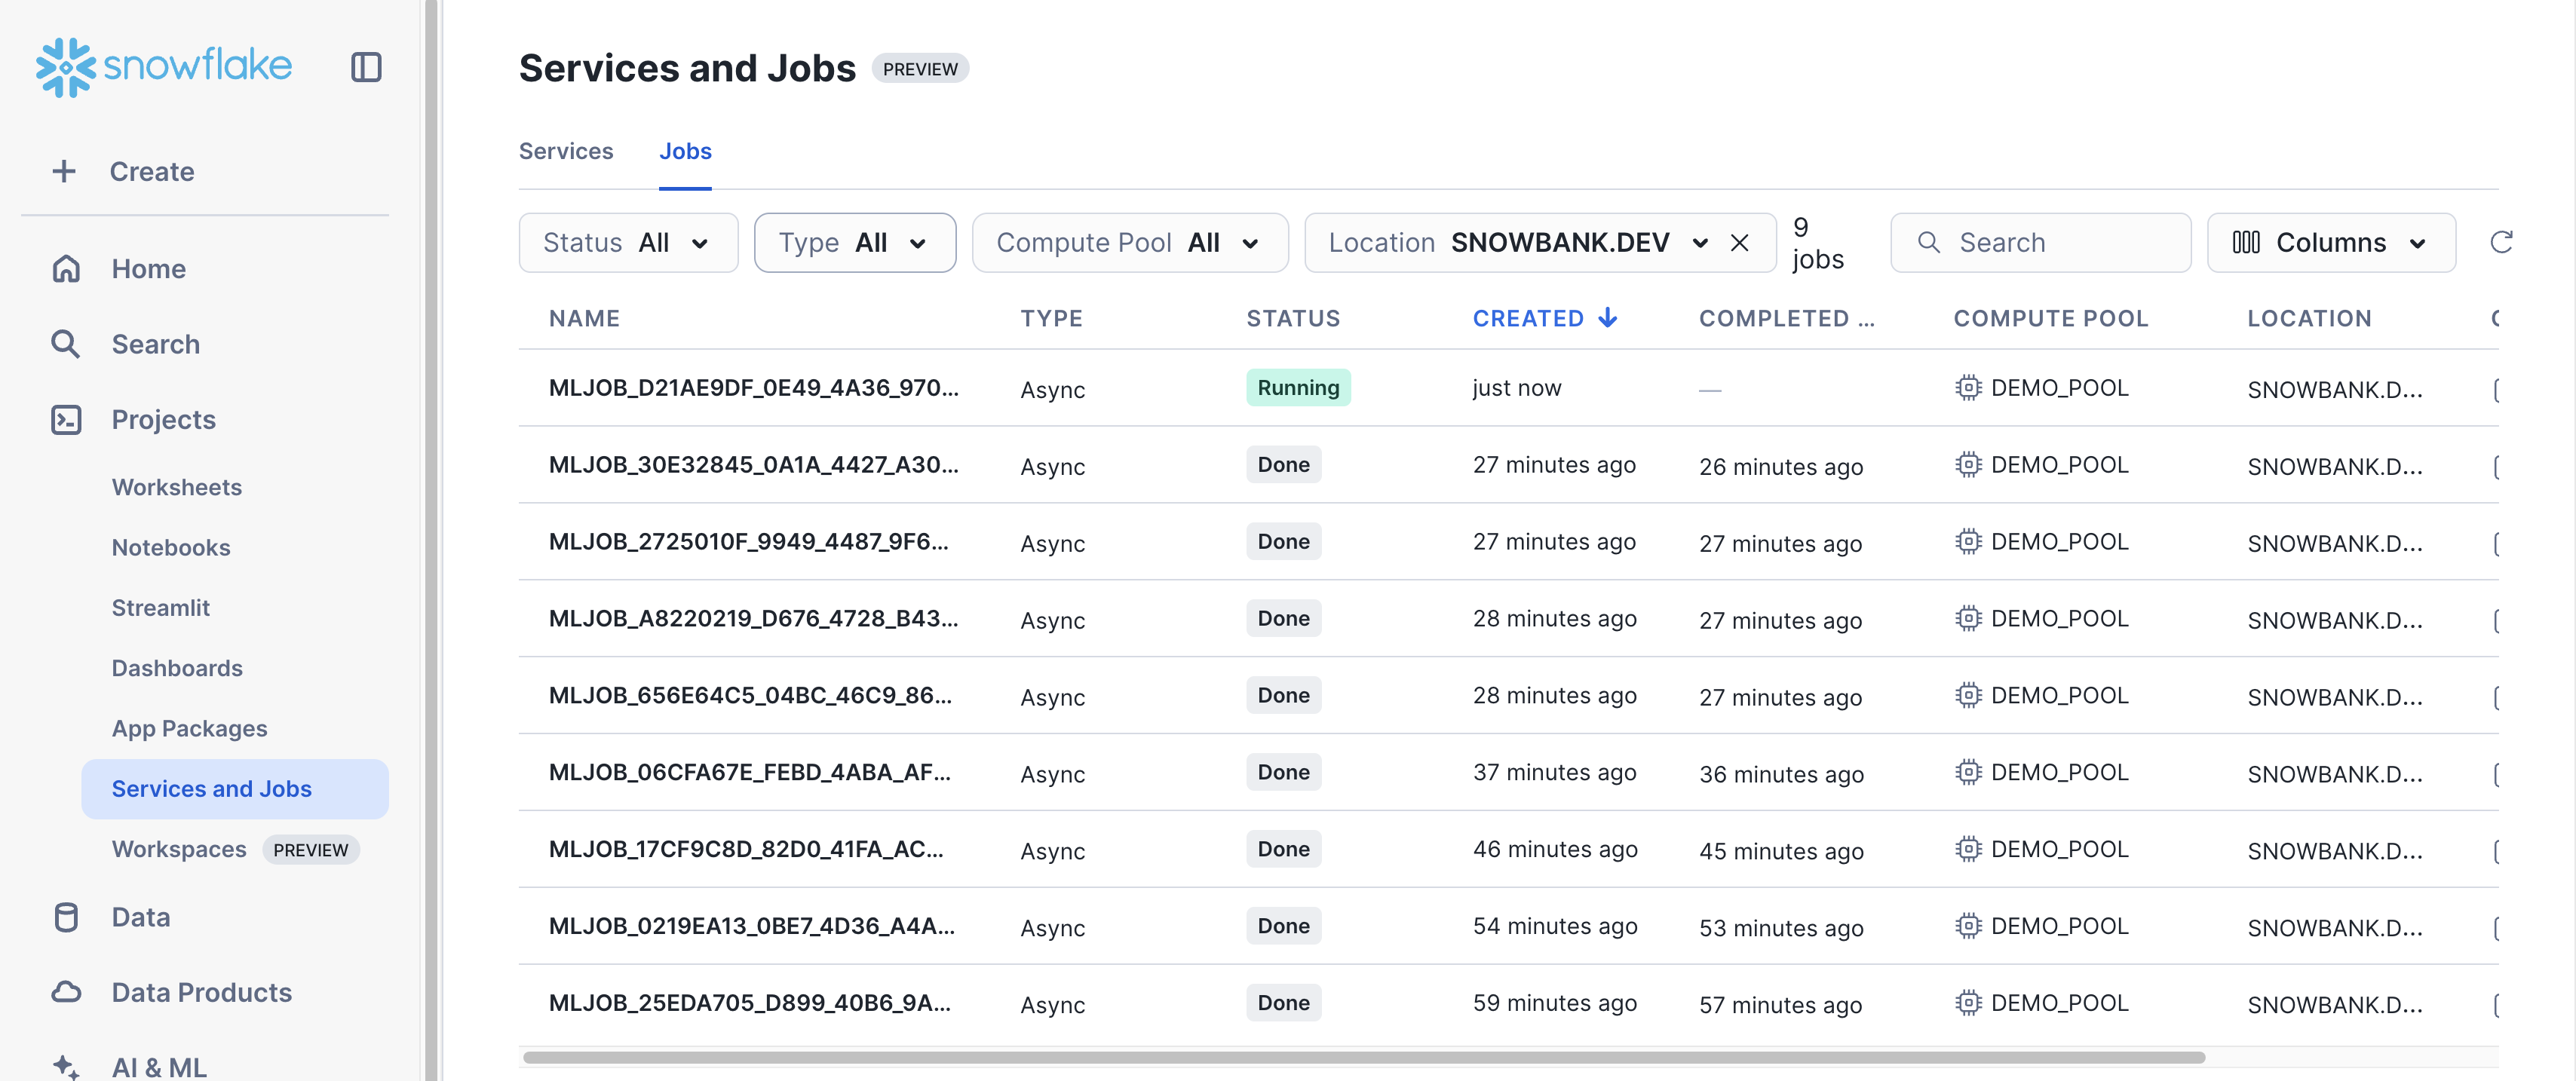
You can monitor the corresponding ML Job for model training via the Job UI in Snowsight.
Task Graph Orchestration
pipeline_dag.py contains the Task Graph definition and can be used to trigger one-off executions or scheduled runs.
One-Time Execution
Deploy and immediately execute the task graph:
python src/pipeline_dag.py --run-dag
The script will:
- Deploy the task graph to Snowflake
- Execute it immediately
- Monitor execution progress
- Display the final status
Scheduled Execution
Deploy the task graph with a recurring schedule:
python src/pipeline_dag.py --schedule 1d   # Daily execution
python src/pipeline_dag.py --schedule 12h  # Every 12 hours
python src/pipeline_dag.py --schedule 30m  # Every 30 minutes
Task Graph UI in Snowsight
Once your Task Graph is deployed and running, you can monitor and inspect your DAG executions through Snowflake's Task Graph UI in Snowsight.
Navigate to Monitoring > Task History to access the Task Graph interface:
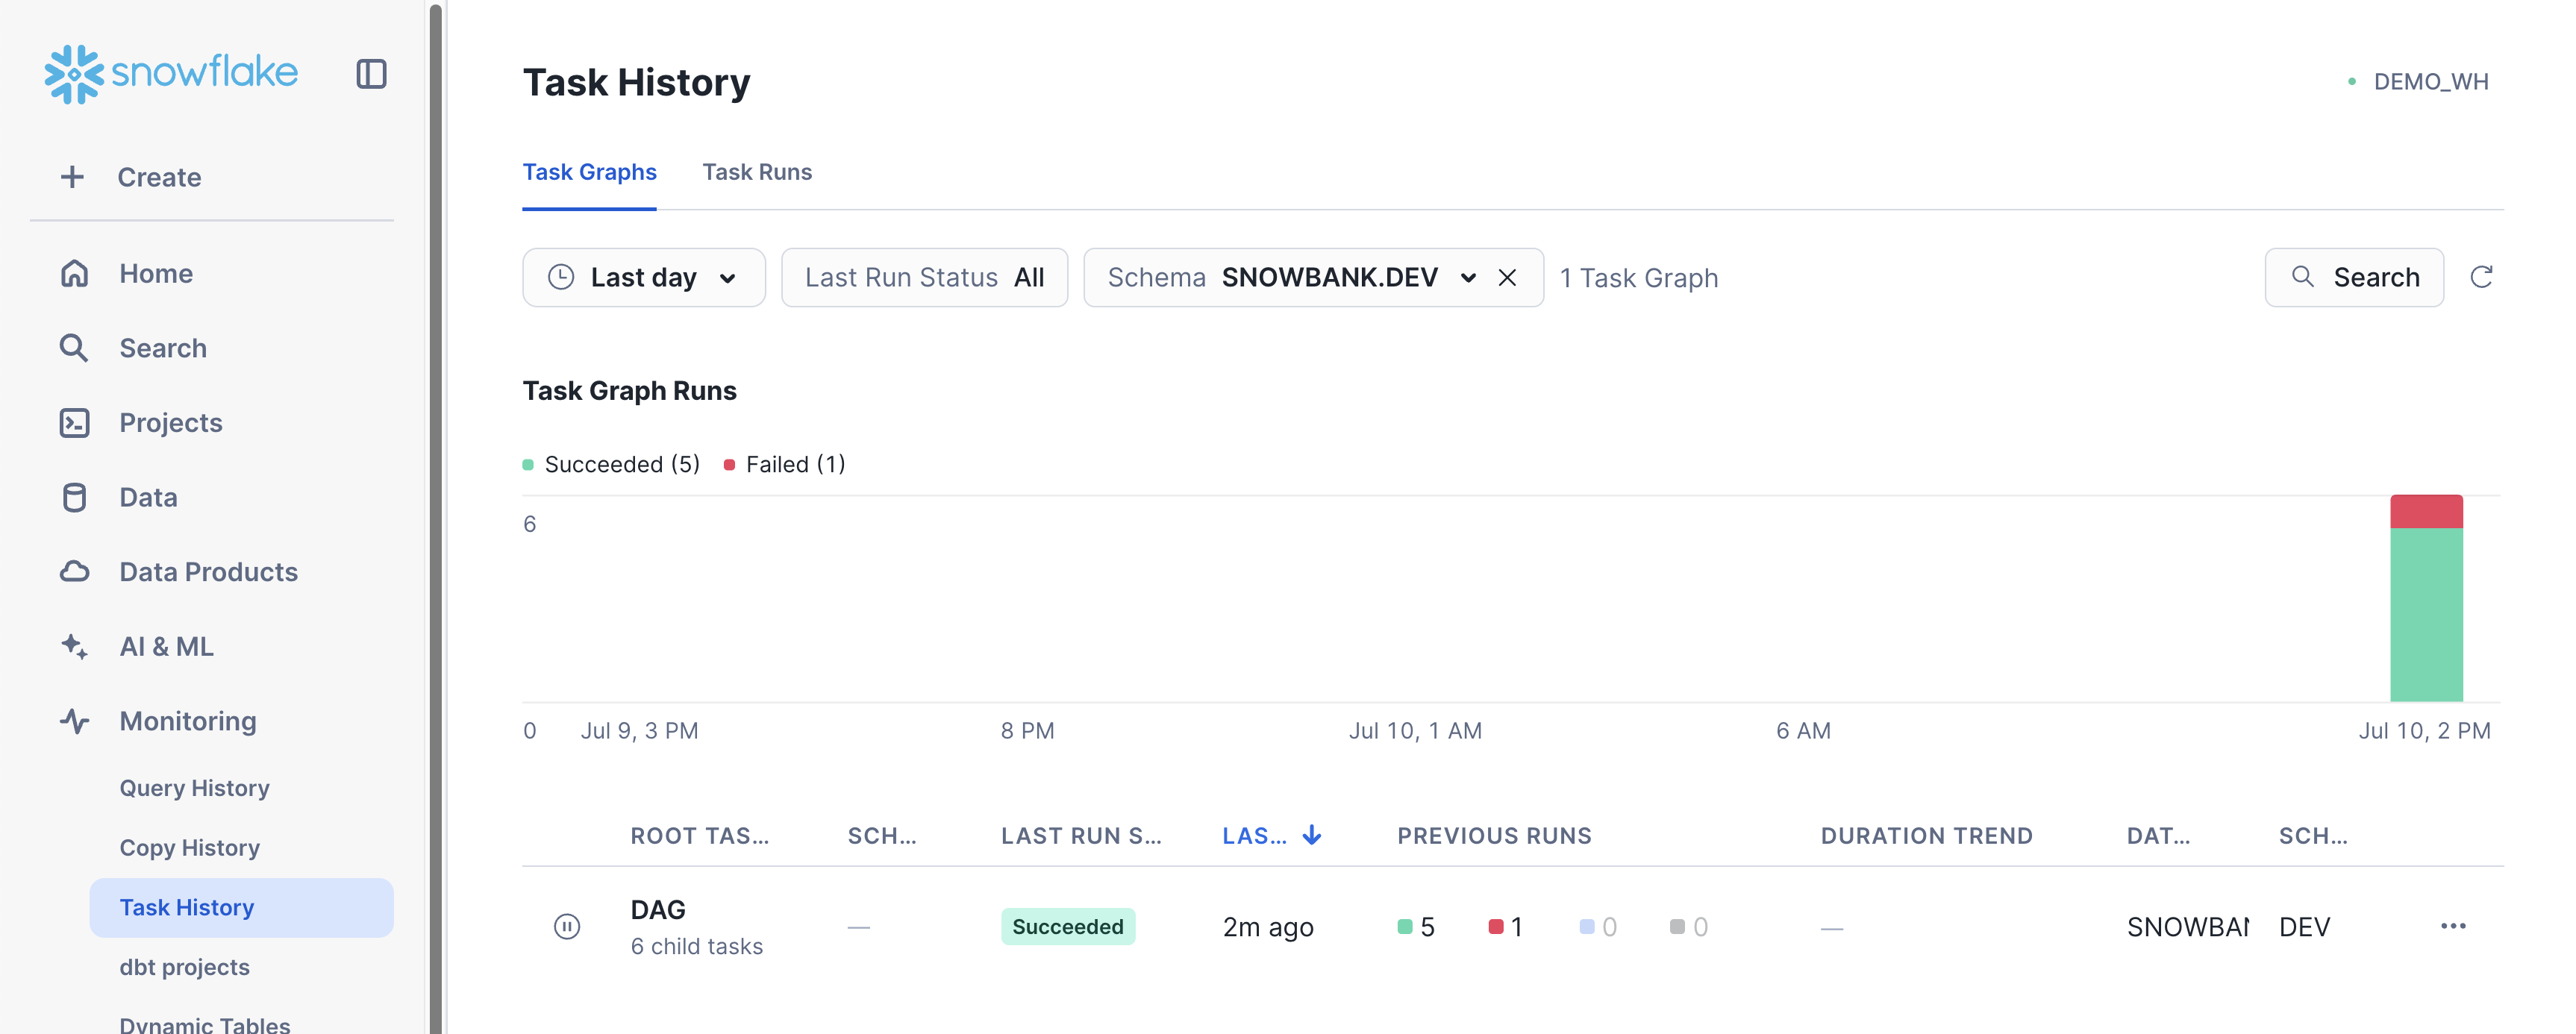
Click into the Task Graph of interest to get a detailed view of the latest execution for that graph. In this case, click on DAG to inspect the Task Graph created in pipeline_dag.py
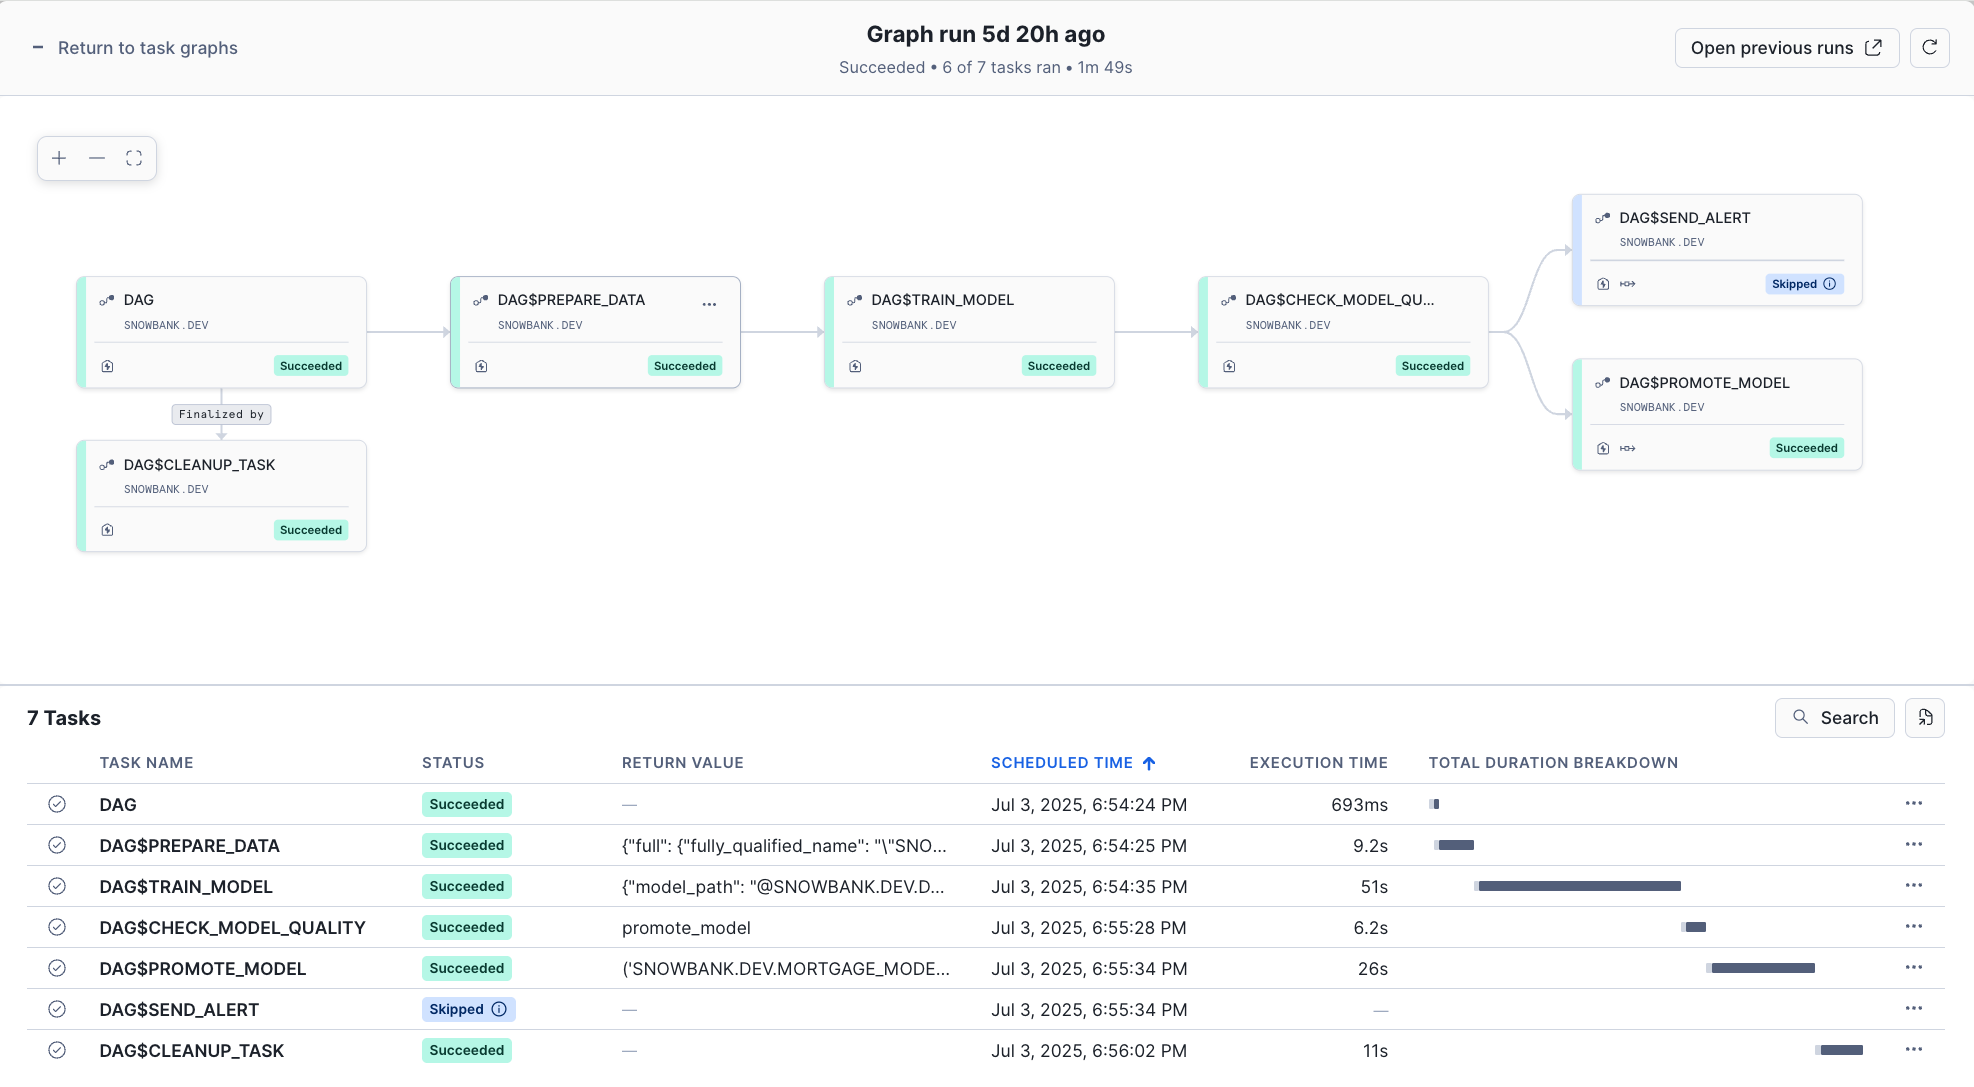
This visual interface makes it easy to:
- Validate that task execution is proceeding as expected
- Debug failed executions by examining task logs and dependencies
- Verify that conditional logic (like model promotion) is working correctly
Task Graph Orchestration
pipeline_dag.py leverages several key Snowflake Task Graph features:
- DAG Creation: Using
DAGcontext manager to define workflow structure - Task Dependencies: Using
>>operator to define execution order - Task Context: Passing values between Tasks in the DAG via the
TaskContext - Branching Logic: Using
DAGTaskBranchfor conditional execution paths - Finalizer Tasks: Ensuring cleanup always runs regardless of success/failure
Model Training on SPCS using ML Jobs
The train_model function uses the @remote decorator to run multi-node training on Snowpark Container Services:
@remote(COMPUTE_POOL, stage_name=JOB_STAGE, target_instances=2)
def train_model(session: Session, input_data: DataSource) -> XGBClassifier:
    # Training logic runs on distributed compute
Conditional Model Promotion
The task graph includes branching logic that only promotes models meeting quality thresholds:
def check_model_quality(session: Session) -> str:
    if metrics[config.metric_name] >= threshold:
        return "promote_model"  # High quality → promote
    else:
        return "send_alert"     # Low quality → alert
Model Registry Integration
Successful models are automatically registered and promoted to production:
mv = register_model(session, model, model_name, version, train_ds, metrics)
promote_model(session, mv)  # Sets as default version
Congratulations! You've successfully built an end-to-end machine learning pipeline using Snowflake Task Graphs and ML Jobs. This production-ready solution demonstrates how to orchestrate the entire ML lifecycle within Snowflake's ecosystem, from data preparation to model deployment with conditional promotion logic.
What You Learned
- Built a complete ML pipeline using Snowflake ML
- Orchestrated ML workflows using Snowflake Task Graphs
- Implemented distributed model training with ML Jobs
- Created conditional logic for model promotion based on quality metrics
- Configured monitoring and debugging for Task Graph executions
- Applied best practices for production ML pipelines
Related Resources
YouTube video:
Web page:
Documentation:
- Snowflake ML Jobs Overview
- Snowflake Task Graphs
- Snowflake Model Registry
- Snowflake Feature Store
- Snowflake Notifications
More ML quickstart:
- Build an End-to-End ML Workflow in Snowflake
- Building ML Models to Crack the Code of Customer Conversions
Happy building with Snowflake ML!