Numerous business are looking at modern data strategy built on platforms that could support agility, growth and operational efficiency. Snowflake is Data Cloud, a future proof solution that can simplify data pipelines for all your businesses so you can focus on your data and analytics instead of infrastructure management and maintenance.
Apache Airflow is an open-source workflow management platform that can be used to author and manage data pipelines. Airflow uses workflows made of directed acyclic graphs (DAGs) of tasks. The Astro CLI is a command line interface for Airflow developed by Astronomer. It's the easiest way to get started with running Apache Airflow locally
dbt is a modern data engineering framework maintained by dbt Labs that is becoming very popular in modern data architectures, leveraging cloud data platforms like Snowflake. dbt CLI is the command line interface for running dbt projects. The CLI is free to use and open source.
cosmos is an Open-Source project that enables you to run your dbt Core projects as Apache Airflow DAGs and Task Groups with a few lines of code.
Snowflake's Snowpark is a developer experience feature introduced by Snowflake to allow data engineers, data scientists, and developers to write code in familiar programming languages, such as Python, and execute it directly within the Snowflake Data Cloud. Snowpark provides a set of native libraries that make it easier to build complex data transformations, UDFs (User-Defined Functions), and data pipelines without having to rely heavily on SQL. This not only makes it more approachable for those who aren't SQL experts but also enables leveraging the full power and scalability of Snowflake's platform.
In this virtual hands-on lab, you will follow a step-by-step guide to using Airflow with dbt to create scheduled data transformation jobs. Then, you'll learn how you can make use of this data within Snowpark for further analysis via Python and Pandas transformations.
Let's get started.
Prerequisites
This guide assumes you have a basic working knowledge of Python, SQL and dbt
What You'll Learn
- how to use an opensource tool like Airflow to create a data scheduler
- how do we write a DAG and upload it onto Airflow
- how to build scalable pipelines using dbt, Airflow and Snowflake
- How to use Snowpark to interact with your Snowflake data using Python
What You'll Need
You will need the following things before beginning:
- Snowflake
- A Snowflake Account.
- A Snowflake User created with appropriate permissions. This user will need permission to create objects in the DEMO_DB database.
- Snowpark Enabled
- GitHub
- A GitHub Account. If you don't already have a GitHub account you can create one for free. Visit the Join GitHub page to get started.
- Integrated Development Environment (IDE)
- Your favorite IDE with Git integration. If you don't already have a favorite IDE that integrates with Git I would recommend the great, free, open-source Visual Studio Code.
- Docker Desktop
- Docker Desktop on your laptop. We will be running Airflow as a container. Please install Docker Desktop on your desired OS by following the Docker setup instructions.
- OpenAI API key
- Optional Step to Enable Chatbot Functionality
- Astro CLI
- The Astro CLI Installed. We will be using the Astro CLI to create our Airflow environments. Please install the Astro CLI on your desired OS by following the Astro CLI setup instructions
What You'll Build
- A simple working Airflow pipeline with dbt and Snowflake
- A slightly more complex Airflow pipeline that incorporates Snowpark to analyze your data with Python
First, let us create a folder by running the command below
mkdir dbt_airflow && cd dbt_airflow
Next, we will use the Astro CLI to create a new Astro project by running the following command. An Astro project contains the set of files necessary to run Airflow, including dedicated folders for your DAG files, plugins, and dependencies.
astro dev init
Now, navigate into the DAG's folder that the Astro CLI created, and create a new folder called dbt by running the following command.
mkdir dbt && cd dbt
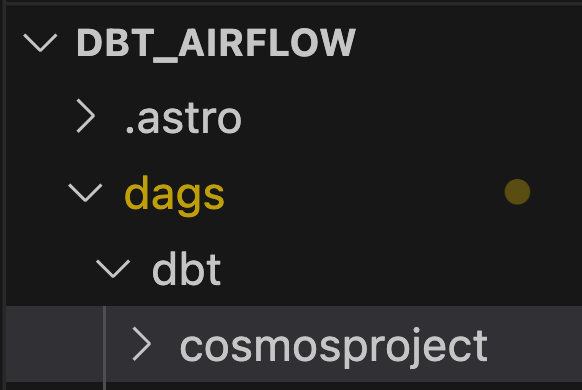
Next, run the following command to install dbt and create all the necessary folders for your project. It will prompt you for a name for your project, enter ‘cosmosproject'.
dbt init
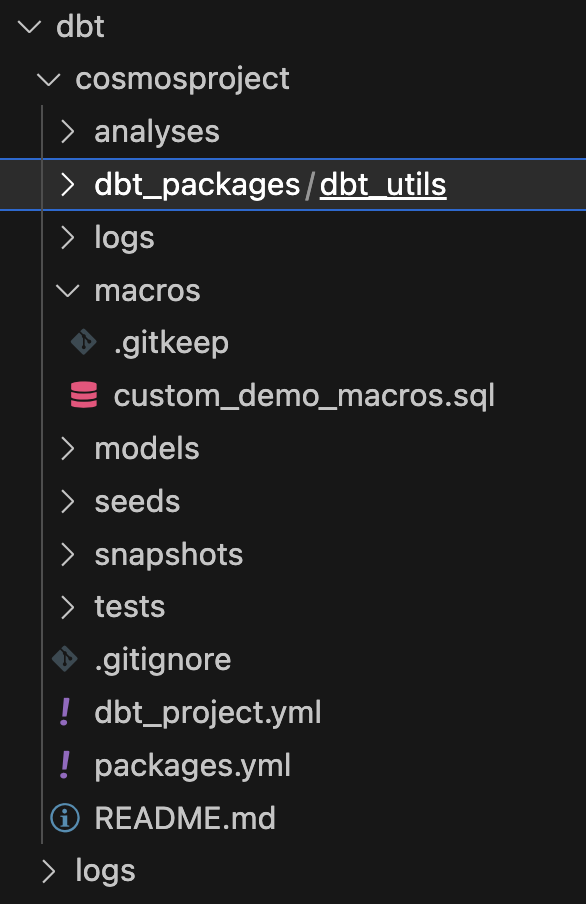
Your tree repository should look like this
Now that we have gotten our repo up, it is time to configure and set up our dbt project.
Before we begin, let's take some time to understand what we are going to do for our dbt project.
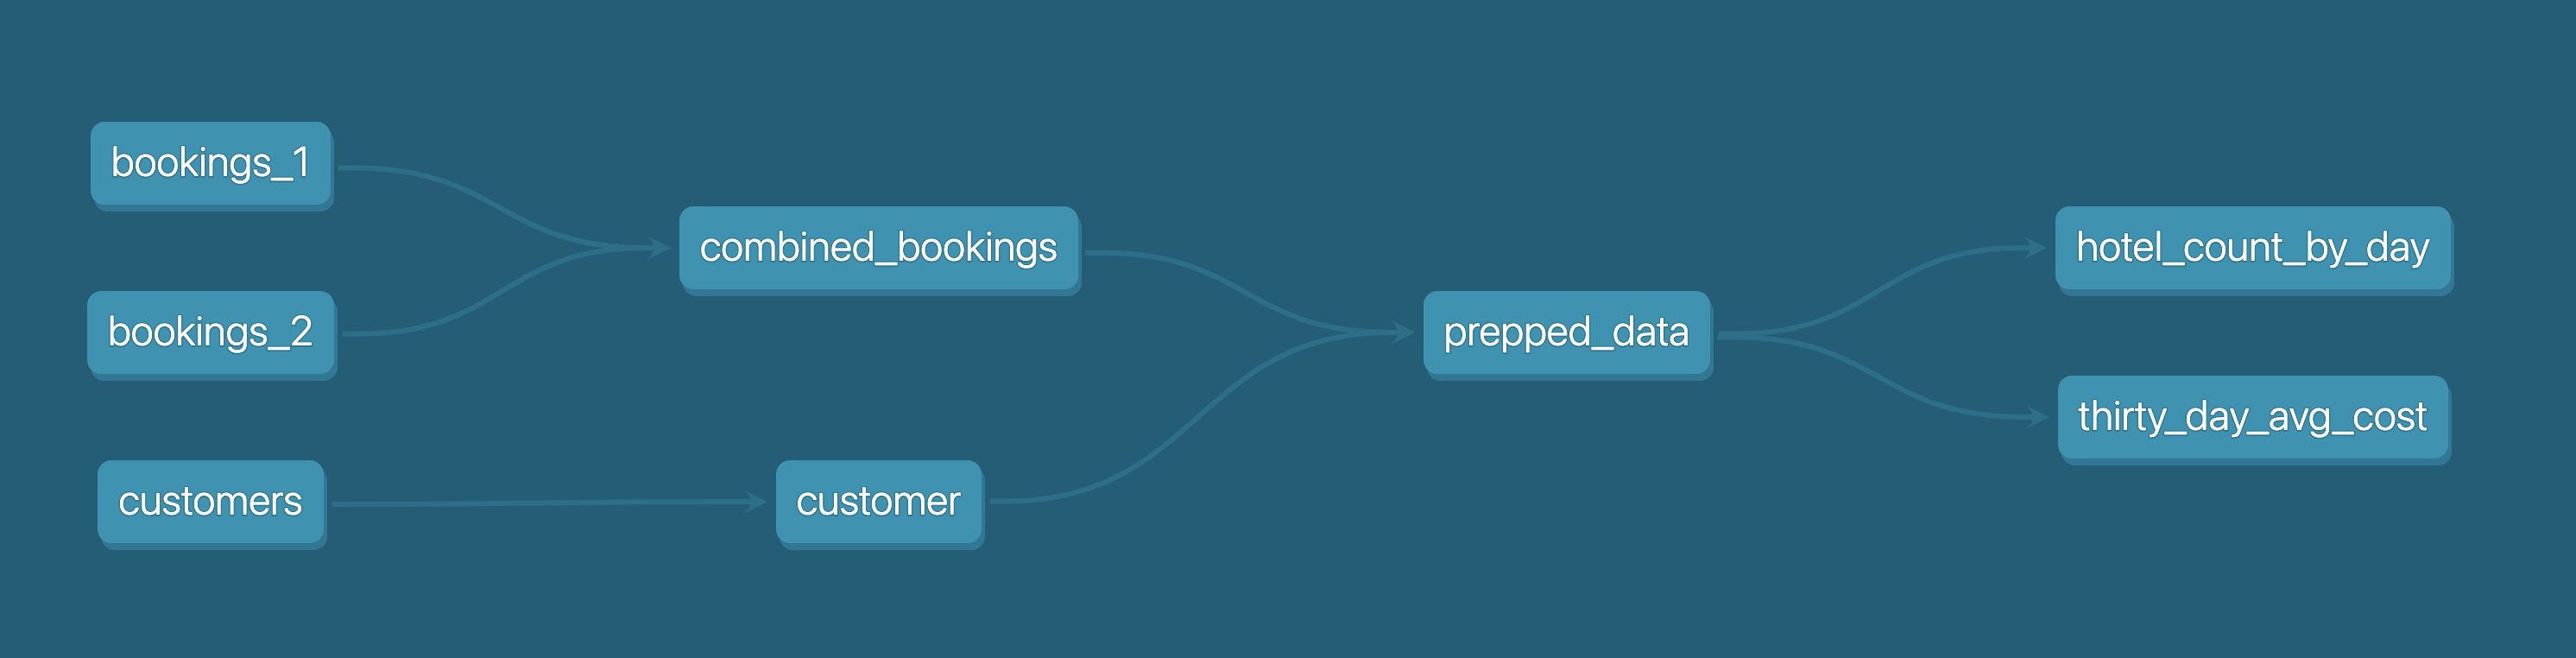
As can be seen in the diagram below, we have 3 csv files bookings_1, bookings_2 and customers . We are going to seed these csv files into Snowflake as tables. This will be detailed later.
Following this, we are going to use dbt to merge bookings_1 and bookings_2 tables into combined_bookings. Then, we are going to join the combined_bookings and customer table on customer_id to form the prepped_data table.
Finally, we are going to perform our analysis and transformation on the prepped_data by creating 2 views.
hotel_count_by_day.sql: This will create a hotel_count_by_day view in the ANALYSIS schema in which we will count the number of hotel bookings by day.thirty_day_avg_cost.sql: This will create a thirty_day_avg_cost view in the ANALYSIS schema in which we will do a average cost of booking for the last 30 days.
First, let's go to the Snowflake console and run the script below after replacing the field with your password of choice. What this does is create a dbt_user and a dbt_dev_role and after which we set up a database for dbt_user.
USE ROLE SECURITYADMIN;

CREATE OR REPLACE ROLE dbt_DEV_ROLE COMMENT='dbt_DEV_ROLE';
GRANT ROLE dbt_DEV_ROLE TO ROLE SYSADMIN;

CREATE OR REPLACE USER dbt_USER PASSWORD='<PASSWORD>'
	DEFAULT_ROLE=dbt_DEV_ROLE
	DEFAULT_WAREHOUSE=dbt_WH
	COMMENT='dbt User';

GRANT ROLE dbt_DEV_ROLE TO USER dbt_USER;

-- Grant privileges to role
USE ROLE ACCOUNTADMIN;

GRANT CREATE DATABASE ON ACCOUNT TO ROLE dbt_DEV_ROLE;

/*---------------------------------------------------------------------------
Next we will create a virtual warehouse that will be used
---------------------------------------------------------------------------*/
USE ROLE SYSADMIN;

--Create Warehouse for dbt work
CREATE OR REPLACE WAREHOUSE dbt_DEV_WH
  WITH WAREHOUSE_SIZE = 'XSMALL'
  AUTO_SUSPEND = 120
  AUTO_RESUME = true
  INITIALLY_SUSPENDED = TRUE;

GRANT ALL ON WAREHOUSE dbt_DEV_WH TO ROLE dbt_DEV_ROLE;
Let's login with the dbt_user and create the database DEMO_dbt by running the command
CREATE OR REPLACE DATABASE DEMO_dbt
Then, in the new Demo_dbt database, copy and paste the following sql statements to create our bookings_1, bookings_2 and customers tables within Snowflake
CREATE TABLE bookings_1 (
    id INTEGER,
    booking_reference INTEGER,
    hotel STRING,
    booking_date DATE,
    cost INTEGER
);
CREATE TABLE bookings_2 (
    id INTEGER,
    booking_reference INTEGER,
    hotel STRING,
    booking_date DATE,
    cost INTEGER
);
CREATE TABLE customers (
    id INTEGER,
    first_name STRING,
    last_name STRING,
    birthdate DATE,
    membership_no INTEGER
);
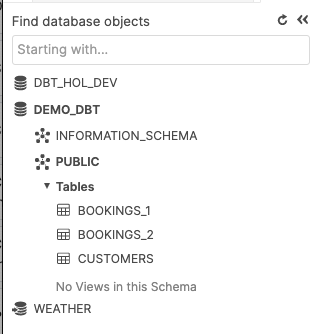
After you're done, you should have a folder structure that looks like the below:
Now, let's go back to our project cosmosproject > dbtthat we set up previously.
We will set up a couple configurations for the respective files below. Please note for the dbt_project.yml you just need to replace the models section
packages.yml (Create in cosmosproject folder if not already present)
packages:
  - package: dbt-labs/dbt_utils
    version: [">=1.0.0", "<2.0.0"]
dbt_project.yml
models:
  my_new_project:
      # Applies to all files under models/example/
      transform:
          schema: transform
          materialized: view
      analysis:
          schema: analysis
          materialized: view
Next, we will install the dbt-labs/dbt_utils that we had placed inside packages.yml. This can be done by running the command dbt deps from the cosmosproject folder.
We will now create a file called custom_demo_macros.sql under the macros folder and input the below sql
{% macro generate_schema_name(custom_schema_name, node) -%}
    {%- set default_schema = target.schema -%}
    {%- if custom_schema_name is none -%}
        {{ default_schema }}
    {%- else -%}
        {{ custom_schema_name | trim }}
    {%- endif -%}
{%- endmacro %}


{% macro set_query_tag() -%}
  {% set new_query_tag = model.name %} {# always use model name #}
  {% if new_query_tag %}
    {% set original_query_tag = get_current_query_tag() %}
    {{ log("Setting query_tag to '" ~ new_query_tag ~ "'. Will reset to '" ~ original_query_tag ~ "' after materialization.") }}
    {% do run_query("alter session set query_tag = '{}'".format(new_query_tag)) %}
    {{ return(original_query_tag)}}
  {% endif %}
  {{ return(none)}}
{% endmacro %}
Now we are done setting up our dbt environment. Your file structure should look like the below screenshot:
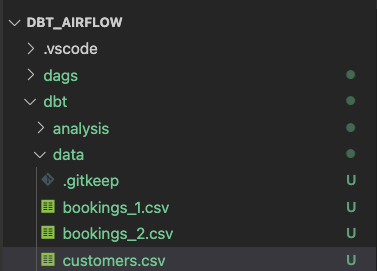
In this section, we will be prepping our sample csv data files alongside the associated sql models.
To start, let us first create 3 excel files under the folder data inside the dbt folder.
bookings_1.csv
id,booking_reference,hotel,booking_date,cost
1,232323231,Pan Pacific,2021-03-19,100
1,232323232,Fullerton,2021-03-20,200
1,232323233,Fullerton,2021-04-20,300
1,232323234,Jackson Square,2021-03-21,400
1,232323235,Mayflower,2021-06-20,500
1,232323236,Suncity,2021-03-19,600
1,232323237,Fullerton,2021-08-20,700
bookings_2.csv
id,booking_reference,hotel,booking_date,cost
2,332323231,Fullerton,2021-03-19,100
2,332323232,Jackson Square,2021-03-20,300
2,332323233,Suncity,2021-03-20,300
2,332323234,Jackson Square,2021-03-21,300
2,332323235,Fullerton,2021-06-20,300
2,332323236,Suncity,2021-03-19,300
2,332323237,Berkly,2021-05-20,200
customers.csv
id,first_name,last_name,birthdate,membership_no
1,jim,jone,1989-03-19,12334
2,adrian,lee,1990-03-10,12323
Our folder structure should be like as below
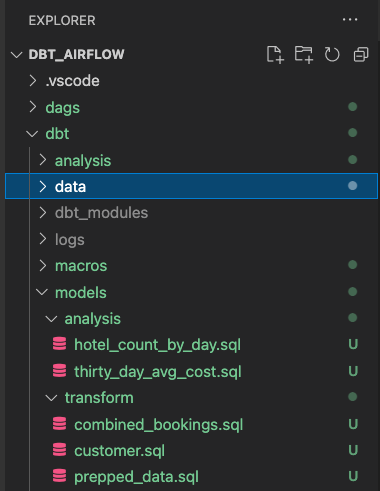
Create 2 folders analysis and transform in the models folder. Please follow the sections below for analysis and transform respectively.
dbt models for transform folder
Inside the transform folder, we will have 3 SQL files
combined_bookings.sql: This will combine the 2 bookings CSV files we had above and create theCOMBINED_BOOKINGSview in theTRANSFORMschema.
combined_bookings.sql
{{ dbt_utils.union_relations(
    relations=[ref('bookings_1'), ref('bookings_2')]
) }}
customer.sql: This will create aCUSTOMERview in theTRANSFORMschema.
customer.sql
SELECT ID
    , FIRST_NAME
    , LAST_NAME
    , birthdate
FROM {{ ref('customers') }}
prepped_data.sql: This will create aPREPPED_DATAview in theTRANSFORMschema in which it will perform an inner join on theCUSTOMERandCOMBINED_BOOKINGSviews from the steps above.
prepped_data.sql
SELECT A.ID
    , FIRST_NAME
    , LAST_NAME
    , birthdate
    , BOOKING_REFERENCE
    , HOTEL
    , BOOKING_DATE
    , COST
FROM {{ref('customer')}}  A
JOIN {{ref('combined_bookings')}} B
on A.ID = B.ID
dbt models for analysis folder
Now let's move on to the analysis folder. Change to the analysis folder and create these 2 SQL files
hotel_count_by_day.sql: This will create a hotel_count_by_day view in theANALYSISschema in which we will count the number of hotel bookings by day.
SELECT
  BOOKING_DATE,
  HOTEL,
  COUNT(ID) as count_bookings
FROM {{ ref('prepped_data') }}
GROUP BY
  BOOKING_DATE,
  HOTEL
thirty_day_avg_cost.sql: This will create a thirty_day_avg_cost view in theANALYSISschema in which we will do a average cost of booking for the last 30 days.
SELECT
  BOOKING_DATE,
  HOTEL,
  COST,
  AVG(COST) OVER (
    ORDER BY BOOKING_DATE ROWS BETWEEN 29 PRECEDING AND CURRENT ROW
  ) as "30_DAY_AVG_COST",
  COST -   AVG(COST) OVER (
    ORDER BY BOOKING_DATE ROWS BETWEEN 29 PRECEDING AND CURRENT ROW
  ) as "DIFF_BTW_ACTUAL_AVG"
FROM {{ ref('prepped_data') }}
Your file structure should look like the below screenshot. We have now finished our dbt models and can proceed to working on using Airflow to manage them.
Now going back to your Airflow directory, open up the requirements.txt file that the Astro CLI created. Copy and paste the following text block to install the Cosmos and Snowflake libraries for Airflow. Cosmos will be used to turn each dbt model into a task/task group complete with retries, alerting, etc.
astronomer-cosmos
apache-airflow-providers-snowflake
Next, open up the Dockerfile in your Airflow folder and copy and paste the following code block to overwrite your existing Dockerfile. These changes will create a virtual environment for dbt along with the adapter to connect to Snowflake. It's recommended to use a virtual environment because dbt and Airflow can have conflicting dependencies.
# syntax=quay.io/astronomer/airflow-extensions:latest

FROM quay.io/astronomer/astro-runtime:9.1.0-python-3.9-base

RUN python -m venv dbt_venv && source dbt_venv/bin/activate && pip install --no-cache-dir dbt-snowflake && deactivate
Now that our Airflow environment is set up, lets create our DAG! Instead of using the conventional DAG definition methods, we'll be using Cosmos' dbtDAG class to create a DAG based on our dbt models. This allows us to turn our dbt projects into Apache Airflow DAGs and Task Groups with a few lines of code. To do so, create a new file in the dags folder called my_cosmos_dag.py and copy and paste the following code block into the file.
from datetime import datetime
import os
from cosmos import DbtDag, ProjectConfig, ProfileConfig, ExecutionConfig
from cosmos.profiles import SnowflakeUserPasswordProfileMapping
from pathlib import Path

dbt_project_path = Path("/usr/local/airflow/dags/dbt/cosmosproject")

profile_config = ProfileConfig(profile_name="default",
                               target_name="dev",
                               profile_mapping=SnowflakeUserPasswordProfileMapping(conn_id="snowflake_default",
                                                    profile_args={
                                                        "database": "demo_dbt",
                                                        "schema": "public"
                                                        },
                                                    ))


dbt_snowflake_dag = DbtDag(project_config=ProjectConfig(dbt_project_path,),
                    operator_args={"install_deps": True},
                    profile_config=profile_config,
                    execution_config=ExecutionConfig(dbt_executable_path=f"{os.environ['AIRFLOW_HOME']}/dbt_venv/bin/dbt",),
                    schedule_interval="@daily",
                    start_date=datetime(2023, 9, 10),
                    catchup=False,
                    dag_id="dbt_snowflake_dag",)
First, we import the various Cosmos libraries
• DbtDag: This is a class that allows you to create an Apache Airflow Directed Acyclic Graph (DAG) for a dbt (Data Build Tool) project. The DAG will execute the dbt project according to the specified configuration.
• ProjectConfig: This class is used to specify the configuration for the dbt project that the DbtDag will execute by pointing it to the path tfor your dbt project.
• ProfileConfig: This class is used to specify the configuration for the database profile that dbt will use when executing the project. This includes the profile name, target name, and any necessary mapping to Airflow connections.
• ExecutionConfig: This class is used to specify any additional configuration for executing the dbt project. We'll be pointing it to the virtual environment we created at {os.environ['AIRFLOW_HOME']}/dbt_venv/bin/dbt in our Dockerfile to execute in.
• PostgresUserPasswordProfileMapping and SnowflakeUserPasswordProfileMapping: These classes are used to map Airflow connections to dbt profiles for PostgreSQL and Snowflake databases, respectively. This allows you to manage your database credentials in Airflow and use them in dbt.
After the imports, a ProfileConfig object is created, which is used to define the configuration for the Snowflake connection. The SnowflakeUserPasswordProfileMapping class is used to map the Snowflake connection in Airflow to a dbt profile. The DbtDag object is then created. This object represents an Airflow DAG that will execute a dbt project. It takes several parameters:
project_config specifies the path to the dbt project we created at /usr/local/airflow/dags/dbt/cosmosprojectoperator_args is used to pass arguments to the dbt operator. Here, it's specifying that dependencies should be installed. profile_config is the profile configuration defined earlier, which will be used to execute the dbt models in Snowflake. execution_config specifies the path to our virtual environment to executue our dbt code in. schedule_interval, start_date, catchup, and dag_id are standard Airflow DAG parameters. You can use any of the standard Airflow DAG parameters in a dbtDAG as well.
Within your Airflow dbt_airflow directory, enter the below command to start your Airflow environment
astro dev start
Running our cosmos_dag!
We will now run our DAG cosmos_dag to see our dbt models in action! If you click the big blue play button on the top left of the screen, you'll see your tasks start to run your dbt transformations within your Snowflake database. If everything goes smoothly, your Snowflake environment should look like the following screenshot:
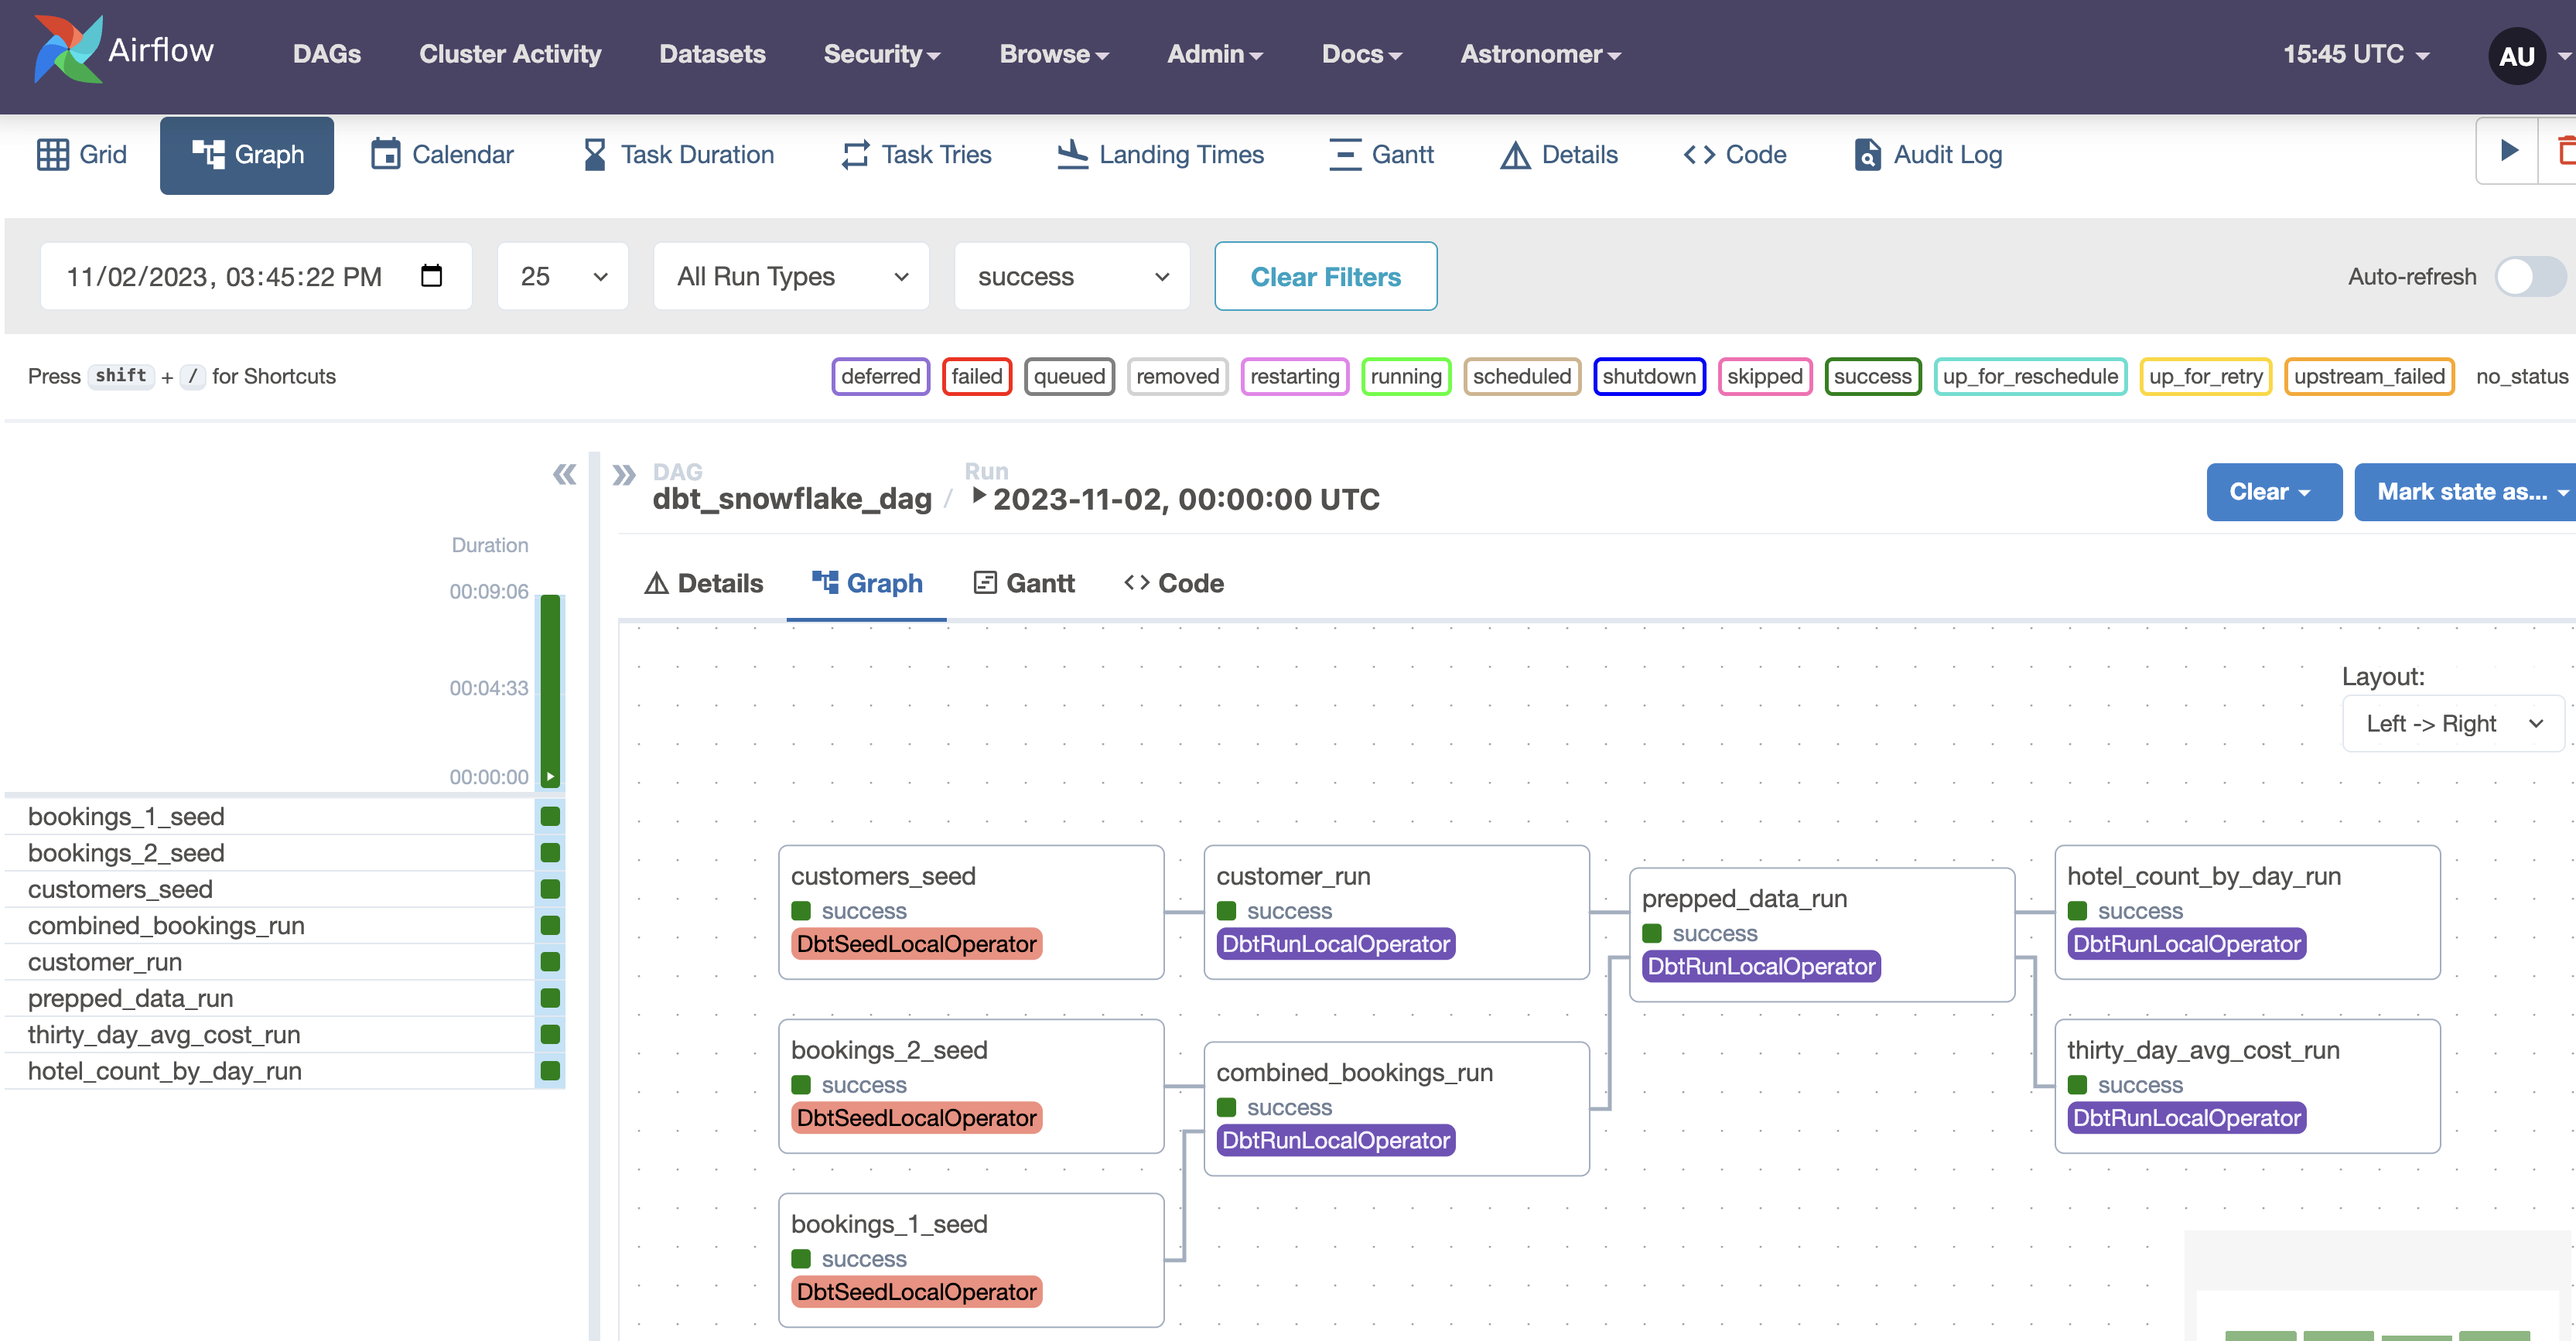
Our Transform and Analysis views have been created successfully! Open them to see the results of our analysis, and check out the other tables to see how data was transformed using dbt.
Now that we've gotten our dbt DAG set up, lets extend it by adding Snowpark for some data analysis with Python. To do this, we'll need to change some existing files and add new requirements to our local airflow environment. While we do this, lets stop our Airflow environment by running the following command so we can restart it later with our changes incorporated.
astro dev stop
First, go to your packages.txt file in your root directory and add build-essential to it, then save. The build-essential package in Linux systems is a reference for all the packages needed to compile a Debian package. We'll be using it to create a Python 3.8 Virtual Environment to run our Snowpark code in, since Snowpark uses Python 3.8, and Airflow only supports Python versions 3.9 and above.
Next, we'll need to import the Snowpark provider to create our Snowpark task. While in development the provider package is not yet in pypi. For this demo, download the astro_provider_snowflake-0.0.0-py3-none-any.whl file from the this link. Then, copy the downloaded file into your include directory in your DBT_Airflow folder. In the future, this will be a part of the base Snowflake provider, but in the meantime you can use this .whl file in any other projects that require it.
After that, we'll need to add the .whl file to our requirements.txt. Copy and paste the following line into your requirements.txt file to do so.
/tmp/astro_provider_snowflake-0.0.0-py3-none-any.whl
Finally, we'll need to create a requirements-snowpark.txt to install some necessary packages into the Python VirtualEnv we'll be creating. To do so, create a file called requirements-snowpark.txt in your root Airflow directory and copy and paste the following code block into it:
psycopg2-binary
snowflake_snowpark_python[pandas]==1.5.1
virtualenv
/tmp/astro_provider_snowflake-0.0.0-py3-none-any.whl
These packages will allow us to interact with Snowpark through the virtual environment we're creating.
Now that we've got our Snowpark provider present, we'll need to edit our Dockerfile to install it, and spin up the Snowpark Python VirtualEnv. Copy and paste the following code block into your Dockerfile to add the necessary commands.
# syntax=quay.io/astronomer/airflow-extensions:latest

FROM quay.io/astronomer/astro-runtime:9.1.0-python-3.9-base

COPY include/astro_provider_snowflake-0.0.0-py3-none-any.whl /tmp

# Create the virtual environment
PYENV 3.8 snowpark requirements-snowpark.txt

# Install packages into the virtual environment
COPY requirements-snowpark.txt /tmp
RUN python3.8 -m pip install -r /tmp/requirements-snowpark.txt


RUN python -m venv dbt_venv && source dbt_venv/bin/activate && pip install --no-cache-dir dbt-snowflake && pip install --no-cache-dir dbt-postgres && deactivate
The first line tells Docker to use the Astronomer provided BuildKit that enables us to create virtual environments with the PYENV command. Then we COPY in the .whl file and use it to create a Python 3.8 VirtualEnv called snowpark.
In order to use Cosmos and Snowpark together, we'll need to use Cosmos's dbtTaskGroup with a normal Airflow DAG instead of a dbtDAG. The definition for this is almost identical to the dbtDAG approach, and allows us to add additional tasks up or downstream of our dbt workflows. Instead of editing our existing DAG, create a new file called cosmosandsnowflake.py in your DAG's folder, and copy the following code into it:
from airflow.operators.dummy_operator import DummyOperator
from astro import sql as aql
from astro.files import File
from astro.sql.table import Table
from cosmos import DbtTaskGroup, ProjectConfig, ProfileConfig, ExecutionConfig
from cosmos.profiles import SnowflakeUserPasswordProfileMapping
from astronomer.providers.snowflake.utils.snowpark_helpers import SnowparkTable
from pathlib import Path

dbt_project_path = Path("/usr/local/airflow/dags/dbt/cosmosproject")
snowflake_objects = {'demo_database': 'DEMO',
                     'demo_schema': 'DEMO',
                     'demo_warehouse': 'COMPUTE_WH',
                     'demo_xcom_stage': 'XCOM_STAGE',
                     'demo_xcom_table': 'XCOM_TABLE',
                     'demo_snowpark_wh': 'SNOWPARK_WH'
}
_SNOWFLAKE_CONN_ID = "snowflake_default"

profile_config = ProfileConfig(
    profile_name="default",
    target_name="dev",
    profile_mapping=SnowflakeUserPasswordProfileMapping(
        conn_id="snowflake_default",
        profile_args={
          "database": "demo_dbt",
            "schema": "public"
        },
    )
)

@dag(default_args={
         "snowflake_conn_id": _SNOWFLAKE_CONN_ID,
         "temp_data_output": "table",
         "temp_data_db": snowflake_objects['demo_database'],
         "temp_data_schema": snowflake_objects['demo_schema'],
         "temp_data_overwrite": True,
         "database": snowflake_objects['demo_database'],
         "schema": snowflake_objects['demo_schema']
         },
    schedule_interval="@daily",
    start_date=datetime(2023, 9, 10),
    catchup=False,
    dag_id="dbt_snowpark",
)
def dbt_snowpark_dag():
    transform_data = DbtTaskGroup(
        group_id="transform_data",
        project_config=ProjectConfig(dbt_project_path),
        profile_config=profile_config,
        execution_config=ExecutionConfig(dbt_executable_path=f"{os.environ['AIRFLOW_HOME']}/dbt_venv/bin/dbt"),
        operator_args={"install_deps": True},
    )

    intermediate = DummyOperator(task_id='intermediate')

    @task.snowpark_virtualenv(python_version='3.8', requirements=['snowflake-ml-python==1.0.9'])
    def findbesthotel(snowflake_objects:dict):

        df = snowpark_session.sql("""
            SELECT *
            FROM DEMO_DBT.PUBLIC.THIRTY_DAY_AVG_COST
        """).to_pandas()
        highest_cost_hotel = df[df['COST'] == df['COST'].max()]['HOTEL']

        highest_cost_hotel_str = str(highest_cost_hotel)
        print(highest_cost_hotel)

        return highest_cost_hotel_str


    besthotel = findbesthotel(snowflake_objects)
    transform_data >> intermediate >> besthotel

dbt_snowpark_dag = dbt_snowpark_dag()
This DAG adds a new Snowpark task called findbesthotel, which means it is executed in a virtual environment with Snowpark and other specified dependencies installed. In this case, we installed the snowflake-ml-python==1.0.9 package to install pandas and other popular data science packages for data analysis. The findbesthotel task connects to a Snowflake database and fetches data from the THIRTY_DAY_AVG_COST table in the PUBLIC schema of the DEMO_DBT database. It then converts this data into a pandas DataFrame and finds the hotel with the highest cost. The name of this hotel is converted to a string, printed, and then returned by the task. All of our dbt transformation set up stays almost identical, aside from changing from using dbtDAG to dbtTaskGroup.
Now that we've add Snowpark to our environment and written our DAG, it's time to restart our Airflow environment and run it! Restart your Airflow environment with the following terminal command
astro dev start
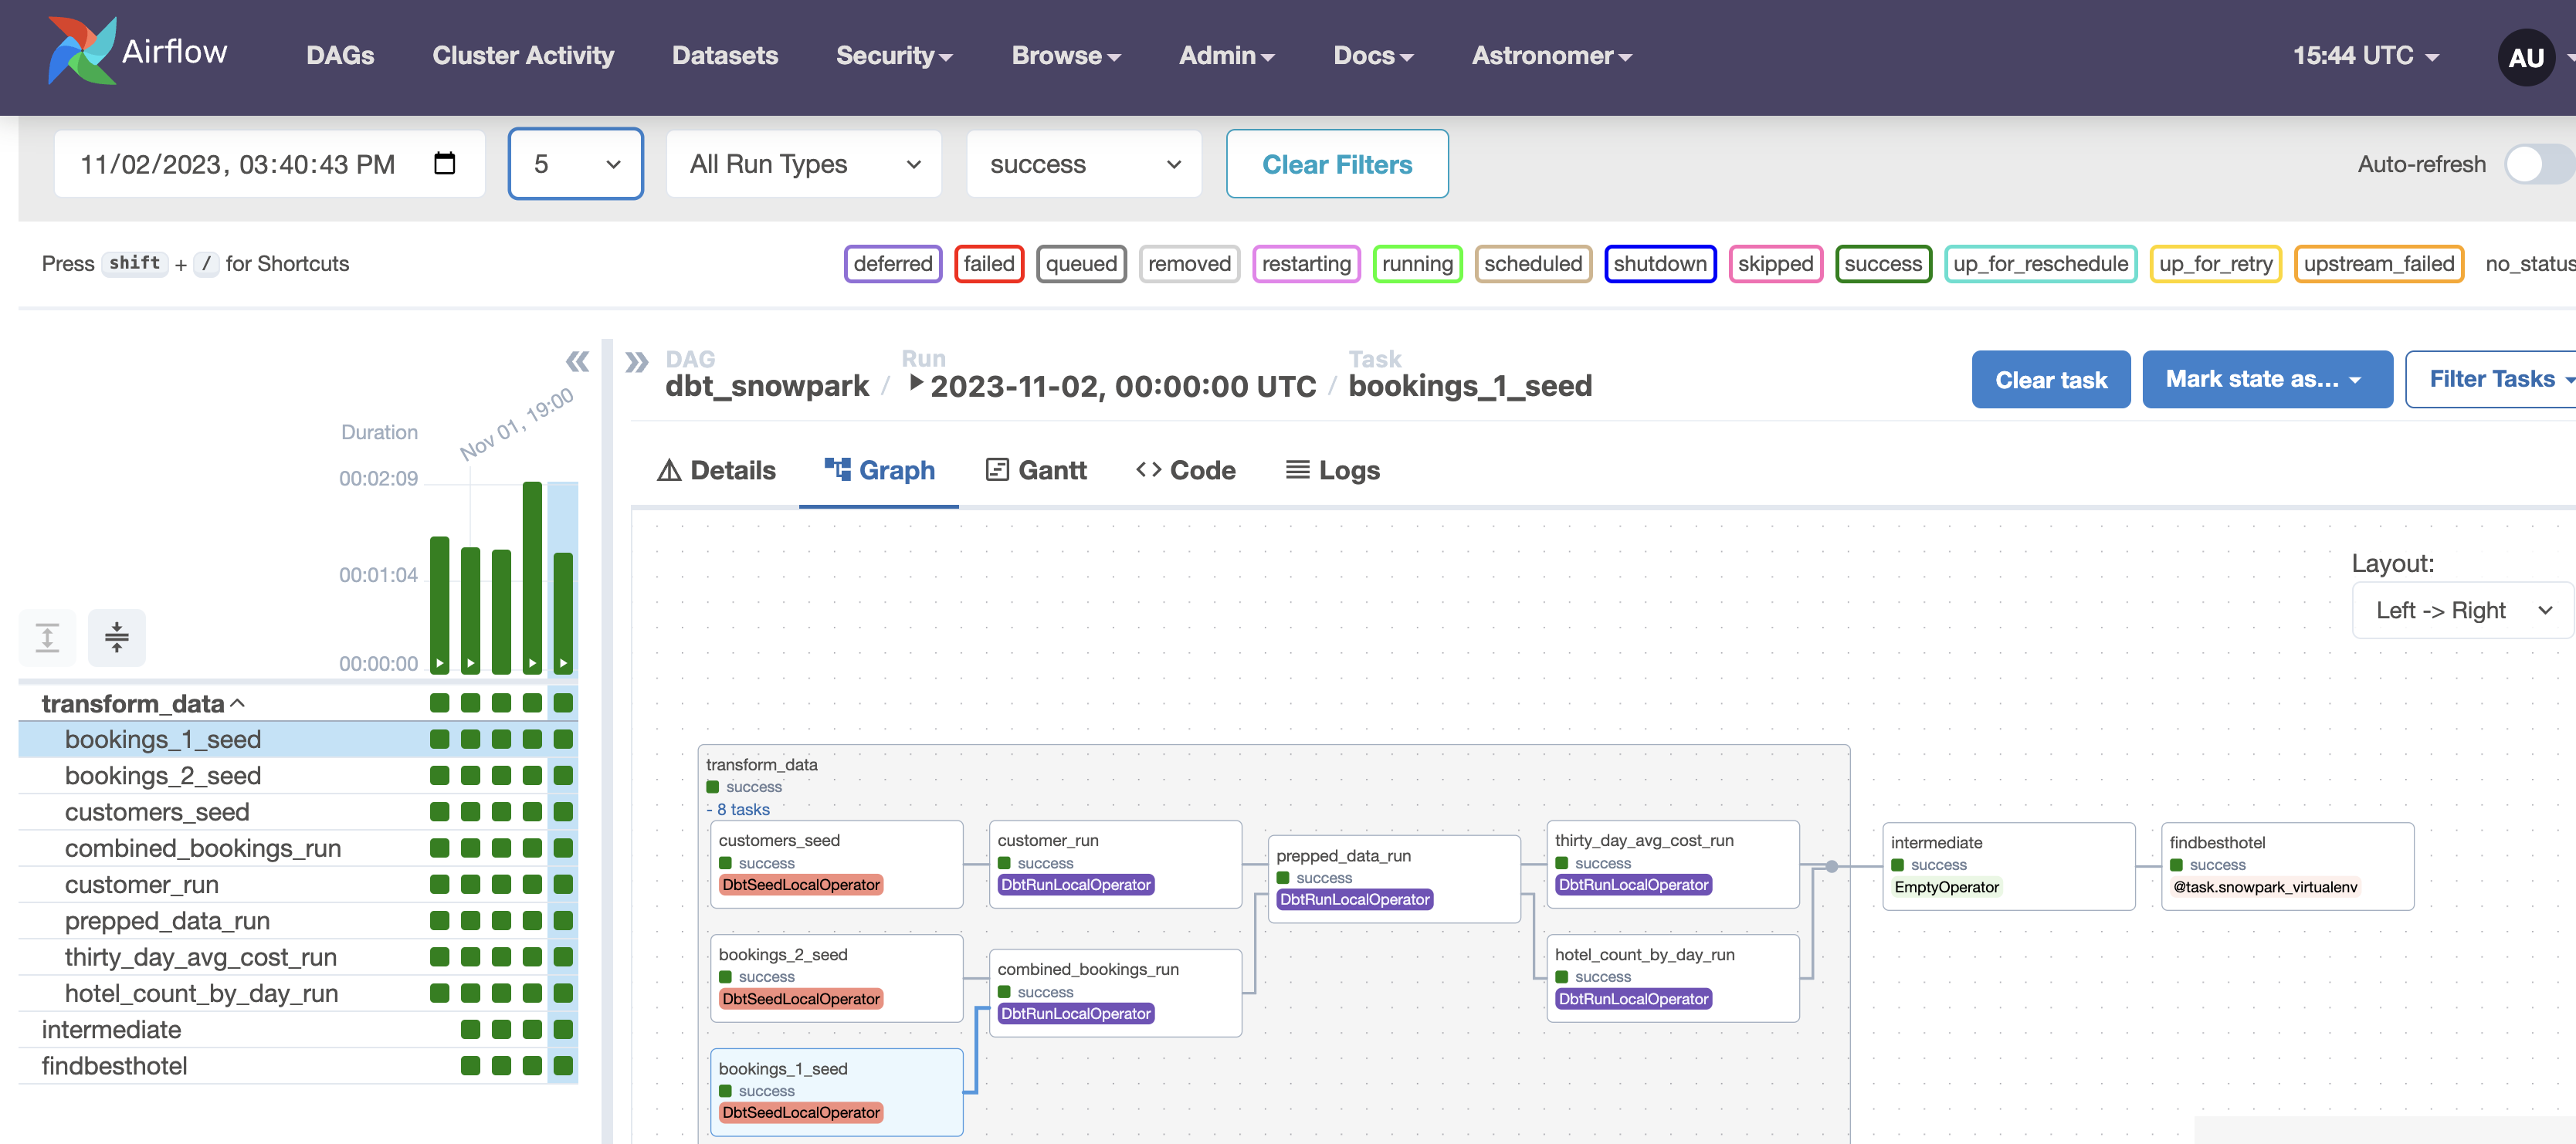
Login to the Airflow UI the same way as before, and you should see a new dag called dbt_snowpark. Since we already set up our Snowflake connection before, we can just run this new DAG immediately by clicking its blue play button. Then, click on the DAG and open up its graph view to watch it run. It should look like the example below:
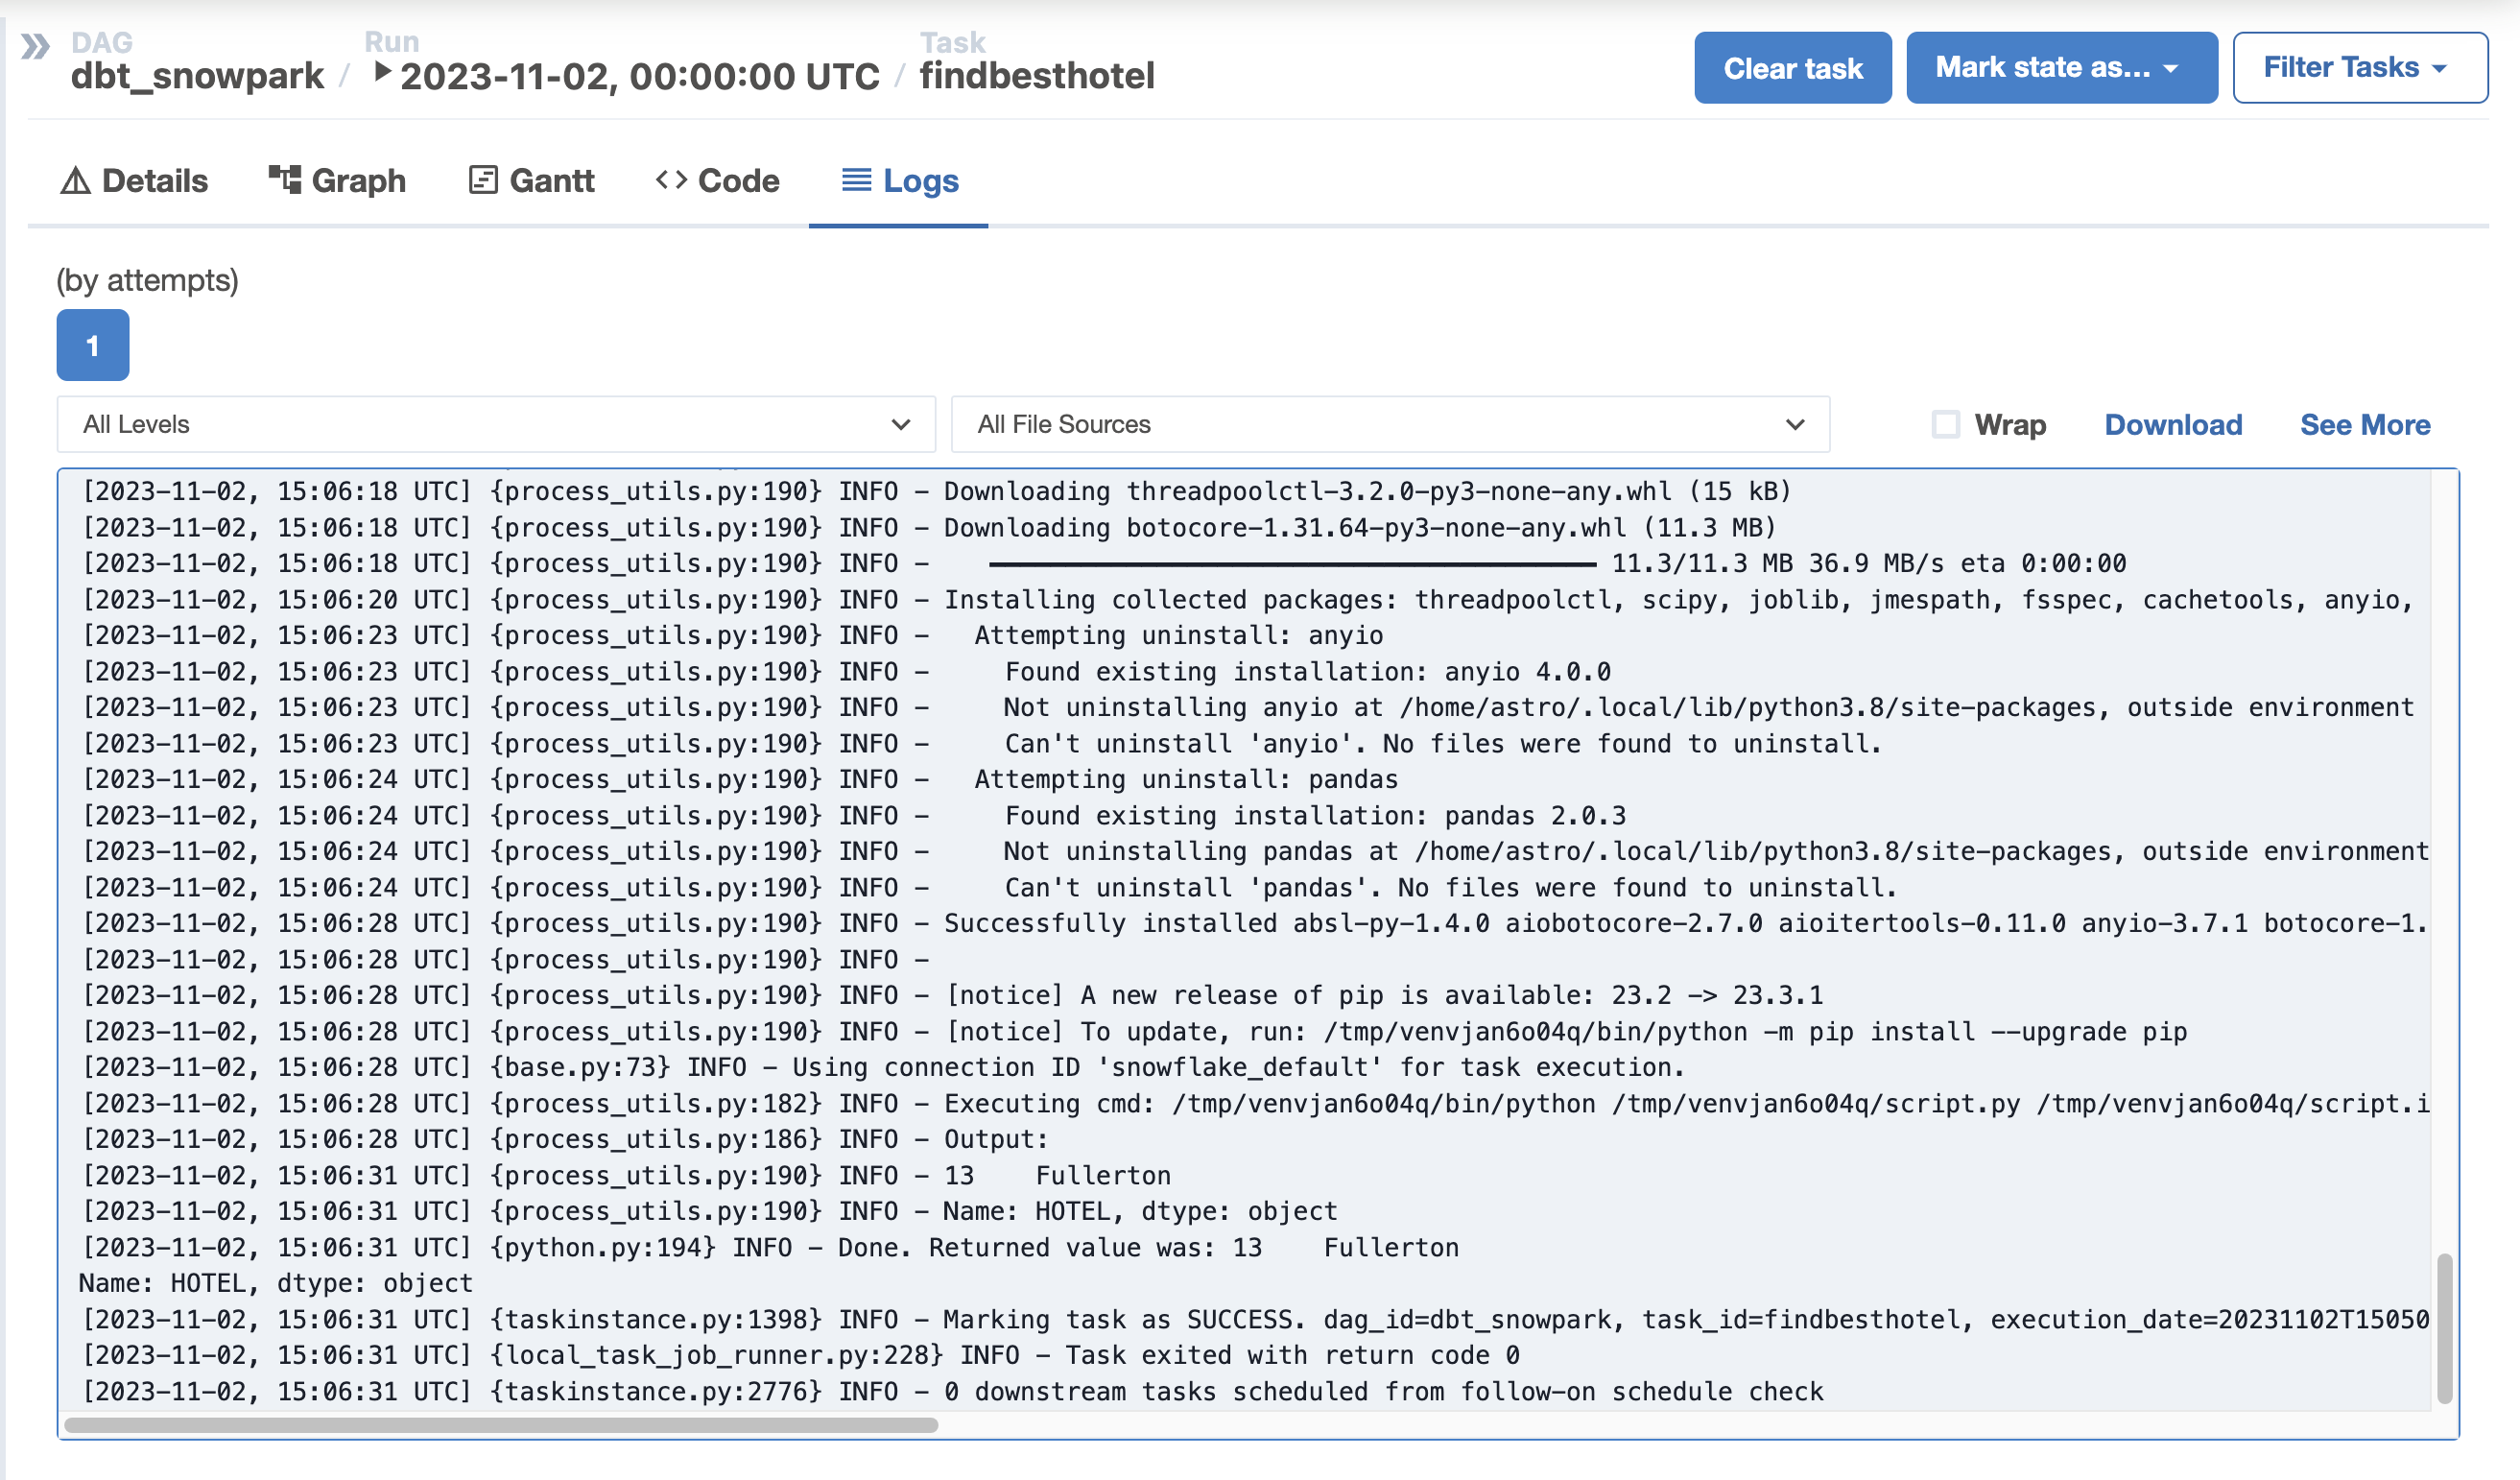
After the DAG has finished running, select the findbesthotel and open its log file. If all has gone well, you'll see the most expensive hotel to stay at printed out for your convenience!
View Streamlit Dashboard
We can now view our analyzed data on a Streamlit dashboard. To do this, go to terminal and enter the following bash command to connect into the Airflow webserver container.
astro dev bash -w
Then, run the following command to start a streamlit application.
cd include/streamlit/src
python -m streamlit run ./streamlit_app.py
After you've done so, you can view your data dashboard by navigating to http://localhost:8501/ in your browser! If you'd like to enable the ability to ask questions about your data, you'll need to add an OpenAI API key in the .env file and restart your Airflow environment.
Congratulations! You have created your first Apache Airflow DAG with dbt, Cosmos, Snowflake, and Snowpark! We encourage you to continue with your free trial by loading your own sample or production data and by using some of the more advanced capabilities of Airflow and Snowflake not covered in this lab.
Additional Resources:
- Join our dbt community Slack which contains more than 18,000 data practitioners today. We have a dedicated slack channel #db-snowflake to Snowflake related content.
- Quick tutorial on how to write a simple Airflow DAG
- Documentation on how to use Cosmos to render dbt workflows in Airflow Cosmos
What we've covered:
- How to set up Airflow, dbt & Snowflake
- How to create a dbt DAG using Cosmos to run dbt models using Airflow